Introduction
Tired of the same old pasta salad that leaves you feeling flat? Get ready for a vibrant, protein-packed twist that will revolutionize your potluck game and become your new favorite go-to! This High-Protein Elote Pasta Salad isn’t just another side dish; it’s a culinary fusion, blending the irresistible flavors of classic Mexican street corn (elote) with the satisfying heartiness of a pasta salad. We’ve taken the creamy, tangy, and subtly spicy essence of elote and transformed it into a convenient, portable dish designed for maximum flavor and satiety, making it perfect for any occasion, from a quick lunch to a festive gathering.
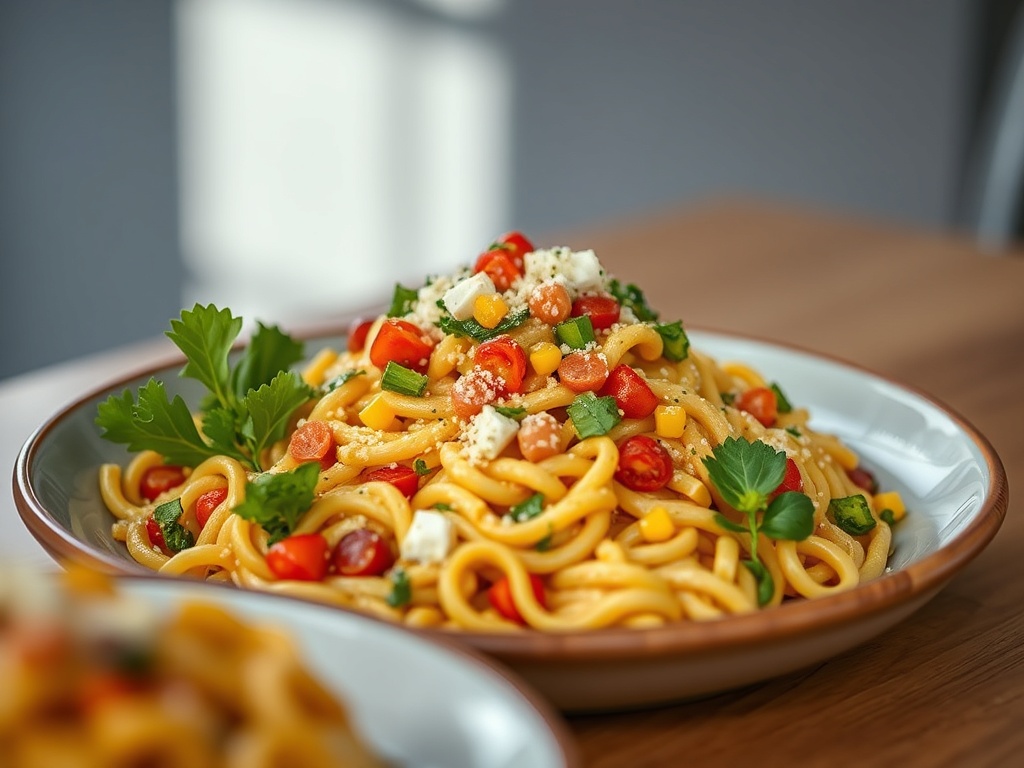
Our inspiration for this dish comes directly from the bustling streets of Mexico, where elote reigns supreme. Traditionally, elote features grilled corn on the cob generously slathered with mayonnaise, lime juice, chili powder, and crumbly cotija cheese. We’ve thoughtfully captured these iconic components and integrated them into a pasta salad format, offering all the beloved flavors in an easy-to-eat, fork-friendly presentation. This recipe is a celebration of those bold, zesty, and comforting tastes, ensuring every bite transports you straight to a vibrant Mexican fiesta, but with an added nutritional punch that makes it even better.
But why “high-protein”? Because protein is a powerhouse nutrient, essential for everything from muscle repair and growth to sustained energy and keeping you feeling full and satisfied for longer. This emphasis on protein makes our Elote Pasta Salad not just delicious, but also incredibly beneficial for your health and lifestyle. It’s an ideal choice for meal preppers looking for quick, nutritious meals throughout the week, potluck enthusiasts aiming to impress with a dish that stands out, or anyone leading an active lifestyle who needs a meal that fuels their day. We firmly believe that “high-protein” doesn’t mean sacrificing flavor; in fact, with the right ingredients and our expert guidance, it means elevating your culinary experience to new, delicious heights. This recipe is for meal preppers, potluck enthusiasts, healthy eaters, and anyone who craves a flavorful and filling side or light main that truly delivers.
Nutritional Information
Per serving (approximate values):
- Calories: 520
- Protein: 35g
- Carbohydrates: 55g
- Fat: 20g
- Fiber: 7g
- Sodium: 680mg
Ingredients
- 12 ounces rotini pasta (or fusilli, orecchiette)
- 1 pound boneless, skinless chicken breasts
- 3 cups fresh corn kernels (from about 4-5 ears), frozen (thawed), or canned (drained)
- ½ cup mayonnaise (full-fat or light)
- ½ cup plain Greek yogurt (full-fat or 2%)
- ¼ cup fresh lime juice (from 2-3 limes)
- ½ cup crumbled cotija cheese (or finely crumbled feta cheese)
- 1 teaspoon chili powder
- ½ teaspoon smoked paprika
- ½ teaspoon garlic powder
- ½ teaspoon salt, plus more for pasta water
- ¼ teaspoon black pepper, plus more to taste
- ½ cup finely diced red onion
- ½ cup chopped fresh cilantro, plus extra for garnish
- 1 small jalapeño, finely minced (seeds removed for less heat, optional)
- ¼ cup finely diced red bell pepper (optional)
- Lime wedges, for serving (optional)
Instructions
- Bring a large pot of salted water to a rolling boil. Add the rotini pasta and cook according to package directions until al dente. Drain the pasta thoroughly and immediately rinse with cold water until completely cool. This stops the cooking process and prevents the pasta from sticking together. Set aside in a large mixing bowl.
- While the pasta cooks, prepare the chicken. Season the chicken breasts with a pinch of salt and pepper. Grill, pan-fry, or bake the chicken until fully cooked through and no longer pink inside (internal temperature of 165°F / 74°C). Once cooked, let the chicken rest for a few minutes, then dice it into ½-inch pieces. Add the diced chicken to the bowl with the cooled pasta.
- If using fresh corn, grill or char the corn kernels. You can do this on a grill, in a hot cast iron skillet, or under the broiler until lightly browned and slightly smoky. If using frozen corn, ensure it is fully thawed and drained. If using canned corn, drain it very well to remove excess liquid. Add the corn kernels to the bowl with the pasta and chicken.
- In a separate medium-sized bowl, prepare the elote-inspired dressing. Whisk together the mayonnaise, Greek yogurt, fresh lime juice, crumbled cotija cheese, chili powder, smoked paprika, garlic powder, salt, and black pepper until well combined and smooth. Taste the dressing and adjust seasonings as needed, adding more salt, pepper, or lime juice to your preference.
- Add the finely diced red onion, chopped fresh cilantro, and minced jalapeño (if using) to the large bowl with the pasta, chicken, and corn. If you’re adding optional red bell pepper, include it now.
- Pour the prepared dressing over all the ingredients in the large bowl. Toss everything gently but thoroughly, ensuring that the pasta, chicken, corn, and vegetables are evenly coated with the creamy dressing.
- Cover the bowl tightly with plastic wrap and refrigerate for at least 30 minutes to allow the flavors to meld and deepen. Chilling for an hour or two, or even overnight, will yield the best results.
- Before serving, give the pasta salad another gentle toss. Garnish with extra crumbled cotija cheese, a sprinkle of fresh cilantro, and a few lime wedges on the side for an extra squeeze of freshness. Serve chilled.
Cooking Tips and Variations
Achieving the perfect texture in your pasta salad starts with the pasta itself. Always cook your pasta to an al dente consistency – it should be firm to the bite, not mushy. Overcooked pasta will fall apart and become mealy in a cold salad. Immediately after draining, rinse the pasta with cold water. This crucial step stops the cooking process, washes away excess starch that can make the pasta sticky, and cools it down quickly, which is essential for a cold salad. Don’t skip the chilling time! While it might be tempting to serve immediately, allowing the salad to chill for at least 30 minutes, or ideally longer, lets the flavors fully meld and deepen, transforming it from good to truly great. Before serving, always taste and adjust the seasonings. Cold dishes often need a little more salt or an extra squeeze of lime to really pop.
This recipe is wonderfully adaptable, allowing for numerous customizations to suit various dietary needs and preferences. For a delicious vegetarian option, simply omit the grilled chicken and instead boost the protein with extra black beans, edamame, or chickpeas. If you’re aiming for a vegan version, swap the mayonnaise for a high-quality vegan mayonnaise and use a plant-based Greek yogurt alternative. You’ll also need to omit the cotija cheese or use a vegan feta substitute. To control the spice level, adjust the amount of jalapeño you include; removing the seeds and white membranes will significantly reduce the heat. For an extra kick, a dash of your favorite hot sauce can be stirred into the dressing. Feel free to load up on extra veggies! Diced bell peppers of any color, cherry tomatoes halved, or even some finely chopped zucchini can add more freshness and nutrients. If adding avocado, dice it and gently fold it in just before serving to prevent browning. Beyond chicken, other proteins like grilled shrimp, thinly sliced grilled steak, or even hard-boiled eggs can be fantastic additions. Experiment with different pasta shapes too, such as orzo or small shells, for a different textural experience.
Storage and Reheating
This High-Protein Elote Pasta Salad is an excellent candidate for meal prep and stores beautifully. Once prepared, transfer any leftovers to an airtight container and refrigerate promptly. It will maintain its delicious flavor and texture for 3-4 days when stored correctly in the refrigerator. Due to the creamy dressing, it’s not suitable for freezing, as the dressing can separate and become watery upon thawing.
Since this is a cold pasta salad, reheating is generally not recommended or necessary. It is designed to be enjoyed chilled. If you find the pasta salad has thickened slightly in the refrigerator, you can loosen it with a splash of milk (dairy or non-dairy), a tiny bit more lime juice, or a tablespoon of water before serving. Just stir gently until it reaches your desired consistency. This salad is perfect for packing into lunch containers or bringing to potlucks, as it tastes best when served cold.
Frequently Asked Questions
What kind of pasta works best for this salad?
We recommend using a short, sturdy pasta shape with plenty of nooks and crannies to hold the creamy dressing and other ingredients. Rotini, fusilli, orecchiette, or even medium shells are excellent choices as they capture the flavors wonderfully and provide a satisfying texture. Avoid very thin or delicate pastas that might break down too easily.
Can I make this salad ahead of time for a party?
Absolutely! This High-Protein Elote Pasta Salad is ideal for making ahead. In fact, it tastes even better after the flavors have had a chance to meld and develop in the refrigerator for at least a few hours, or even overnight. If making it a day in advance, you might want to hold off on adding the fresh cilantro until just before serving to ensure its vibrant color and fresh aroma are at their peak. If you plan to add avocado, always add it right before serving to prevent browning.
What is cotija cheese, and can I substitute it?
Cotija cheese is a firm, crumbly, and salty Mexican cow’s milk cheese, often referred to as “Mexican Parmesan.” It has a distinct salty and tangy flavor that is crucial for replicating the authentic elote experience. If you can’t find cotija, a good substitute would be crumbled feta cheese, which offers a similar salty and tangy profile, though it will have a slightly softer texture. Parmesan cheese can also work in a pinch for saltiness, but it won’t provide the same tang or crumbly texture.
How can I char corn if I don’t have a grill?
No problem! You can easily char corn kernels on your stovetop. Heat a large cast iron skillet or heavy-bottomed pan over medium-high heat until very hot. Add the corn kernels (without any oil, if possible, for better charring) and cook, stirring occasionally, for 5-7 minutes, or until some of the kernels are lightly browned and slightly smoky. Alternatively, you can spread the corn kernels on a baking sheet and broil them for 3-5 minutes, watching carefully to prevent burning, until they achieve a nice char.