Introduction
Craving a dessert that’s both comforting and guilt-free? Look no further than our Baked Pear with Greek Yogurt recipe. This simple yet elegant dish offers a surprisingly satisfying experience, transforming humble ingredients into a wholesome treat that feels indulgent without the heavy calories. It’s a testament to how natural flavors, when thoughtfully combined, can create something truly special, perfect for satisfying your sweet tooth any time of day.
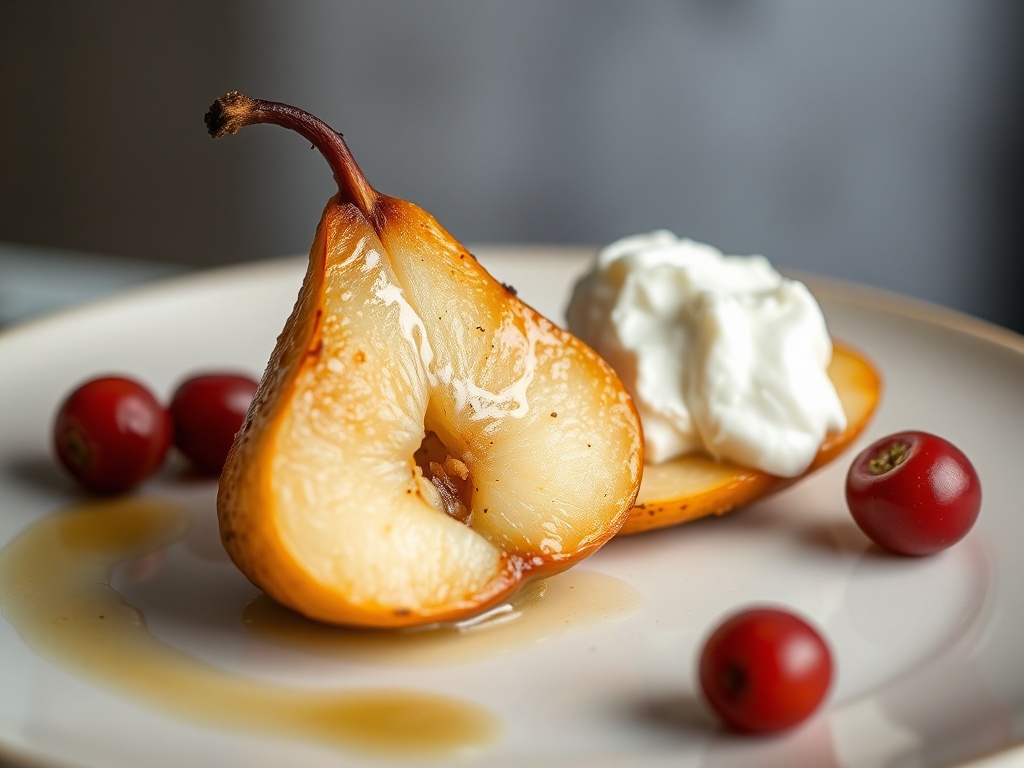
This delightful creation is more than just a recipe; it’s an invitation to embrace healthy indulgence. Imagine tender, sweet pears, gently spiced and baked to perfection, then nestled beside a generous dollop of creamy, tangy Greek yogurt. It’s a symphony of textures and flavors that will tantalize your taste buds and nourish your body. Whether you’re seeking a nutritious start to your day, a light and satisfying afternoon snack, or a sophisticated yet easy dessert, this baked pear dish is your answer.
What makes this recipe truly stand out is its effortless charm and impressive versatility. It’s incredibly easy to prepare, making it a fantastic option for busy individuals who don’t want to compromise on taste or health. With minimal added sugar and a wealth of natural goodness from the fruit and dairy, it’s a smart choice for anyone looking to incorporate more wholesome foods into their diet. Get ready to discover your new favorite healthy dessert, a dish that proves delicious can indeed be nutritious.
Nutritional Information
Per serving (approximate values):
- Calories: 220
- Protein: 15g
- Carbohydrates: 38g
- Fat: 4g
- Fiber: 6g
- Sodium: 60mg
Ingredients
- 2 medium-sized pears (Anjou, Bosc, or Bartlett work best)
- 1 tablespoon maple syrup or honey (plus more for drizzling, optional)
- 1/2 teaspoon ground cinnamon
- 1/4 teaspoon ground nutmeg
- Pinch of ground cardamom (optional)
- 1 cup plain Greek yogurt (full-fat or low-fat, depending on preference)
- 1/4 teaspoon vanilla extract (for yogurt, optional)
- 1 tablespoon chopped walnuts or pecans (for topping, optional)
- 1 teaspoon lemon juice (optional, to prevent browning)
Instructions
- Preheat Your Oven: Start by preheating your oven to 375°F (190°C). This ensures the oven is at the correct temperature when the pears go in, leading to even baking. Line a small baking sheet or an oven-safe dish with parchment paper for easy cleanup.
- Prepare the Pears: Wash the pears thoroughly under cold running water. Carefully cut each pear in half lengthwise. Using a small spoon or melon baller, gently scoop out the core and seeds from the center of each pear half. You can choose to peel the pears for a smoother texture, or leave the skin on for added fiber and a rustic look – both options are delicious. If you’re concerned about browning, especially if preparing ahead, you can brush the cut surfaces with a tiny bit of lemon juice.
- Season the Pears: Arrange the pear halves cut-side up on your prepared baking sheet. In a small bowl, combine the maple syrup (or honey), ground cinnamon, ground nutmeg, and optional cardamom. Stir well to create a fragrant spice mixture. Drizzle or brush this mixture evenly over the cut surfaces of each pear half. Make sure to get some of the mixture into the hollowed-out core area.
- Bake the Pears: Place the baking sheet with the seasoned pears into the preheated oven. Bake for 20 to 30 minutes, or until the pears are fork-tender and slightly caramelized around the edges. The exact baking time will depend on the ripeness and size of your pears. You’re looking for a soft, yielding texture but not mushy.
- Prepare the Greek Yogurt: While the pears are baking, prepare your Greek yogurt. If desired, stir in 1/4 teaspoon of vanilla extract into the plain Greek yogurt for an extra layer of flavor. This adds a lovely aromatic note that complements the spiced pears beautifully.
- Assemble and Serve: Once the pears are baked to perfection, carefully remove them from the oven. Let them cool for a few minutes, just enough so they are warm but not scorching hot. To serve, place one or two baked pear halves on a plate. Spoon a generous dollop of the vanilla-infused (or plain) Greek yogurt alongside or directly into the hollowed-out center of the pear.
- Add Toppings (Optional): For an added crunch and flavor, sprinkle the chopped walnuts or pecans over the yogurt and pears. If you like a little extra sweetness, a final drizzle of maple syrup or honey can be added. For a sophisticated touch, a tiny drizzle of balsamic glaze can elevate the flavors.
- Enjoy Immediately: Serve your Baked Pear with Greek Yogurt warm. The contrast of the warm, soft pear with the cool, creamy yogurt is truly delightful.
Cooking Tips and Variations
Achieving the perfect baked pear is all about understanding your ingredients and a few simple techniques. For the best results, always choose pears that are slightly firm but ripe. Overly soft pears will turn mushy during baking, while very hard pears will take a long time to soften and may not develop as much natural sweetness. Anjou, Bosc, and Bartlett varieties are excellent choices as they hold their shape well and develop a wonderful flavor when baked. When coring, be gentle to avoid breaking the pear halves, especially if the pears are particularly ripe.
To really boost the flavor, consider adding a tiny splash of vanilla extract directly to the pears along with the spices before baking. This amplifies their natural sweetness. A squeeze of lemon juice on the cut surfaces of the pears before baking not only prevents browning but also brightens the overall flavor profile, cutting through the sweetness with a subtle tang. Don’t underestimate the power of a tiny pinch of salt; it helps to balance the sweetness and bring out the depth of the other flavors. Experiment with different spice combinations too – a touch of ginger or a blend of pumpkin pie spice can be wonderful additions.
This recipe is incredibly versatile and lends itself well to various dietary needs and flavor preferences. For a delightful savory twist, try crumbling a bit of blue cheese into the pear hollows before baking, and then topping with toasted walnuts. The salty, pungent cheese pairs surprisingly well with the sweet pear. If you’re a chocolate lover, a sprinkle of dark chocolate chips or cocoa nibs over the warm pears and yogurt is a decadent addition. For a berry blast, fresh raspberries, blueberries, or sliced strawberries can be added on top with the yogurt. You can also make this recipe entirely dairy-free by using a plain, unsweetened plant-based yogurt (almond, coconut, or soy yogurt work well).
Baked pears are also fantastic for meal prepping. You can bake the pears ahead of time and store them in an airtight container in the refrigerator for up to 3-4 days. When ready to serve, gently reheat them in the microwave or a warm oven, then add your fresh Greek yogurt and toppings. They can even be enjoyed chilled, offering a different but equally refreshing experience. For a more indulgent dessert, a small scoop of vanilla bean ice cream or a dollop of homemade whipped cream can replace the Greek yogurt, creating a truly luxurious treat. For breakfast, serve the baked pears with a sprinkle of granola for added crunch and fiber, or alongside your morning oatmeal.
Storage and Reheating
Storing your baked pears properly ensures they remain fresh and delicious for future enjoyment. Once the baked pears have cooled completely to room temperature, transfer them to an airtight container. You can store them as halves or gently slice them if preferred. Place the container in the refrigerator, where they will keep well for up to 3 to 4 days. It’s best to store the baked pears separately from the Greek yogurt and any toppings, as the yogurt’s texture can change with storage, and toppings might lose their crunch.
When it comes to reheating, you have a few excellent options depending on your preference and time constraints. For the quickest method, place the baked pear halves on a microwave-safe plate and heat on high for 30 to 60 seconds, or until warmed through. Be careful not to overheat, as this can make the pears too soft. If you prefer a more even warmth and slightly crisper edges (especially if they were not peeled), you can reheat them in a preheated oven at 300°F (150°C) for about 5 to 10 minutes. This method works particularly well if you’re reheating multiple pear halves. Once reheated, add your fresh Greek yogurt and desired toppings just before serving. Baked pears can also be enjoyed chilled straight from the refrigerator, offering a cool and refreshing treat, particularly on warmer days.
Frequently Asked Questions
What kind of pears are best for baking?
For baking, it’s best to choose pear varieties that hold their shape well and have a good balance of sweetness and firmness. Anjou, Bosc, and Bartlett pears are excellent choices for baking. They become tender and sweet without turning mushy. Avoid overly ripe or soft pears, as they tend to lose their structure during the baking process.
Can I make this recipe dairy-free?
Absolutely! This recipe is incredibly adaptable for dairy-free diets. Simply swap the traditional Greek yogurt for a plain, unsweetened plant-based yogurt. Almond, coconut, or soy yogurts are all great options that provide a similar creamy texture and tangy flavor. Ensure the plant-based yogurt is unsweetened to control the overall sugar content of the dish.
How can I prevent my pears from browning after cutting them?
Pears, like apples, can oxidize and turn brown when exposed to air. To prevent this, after cutting and coring your pears, you can brush or spritz the cut surfaces with a little lemon juice. The acidity in the lemon juice acts as a natural antioxidant, helping to maintain their fresh color. You can also place them in a bowl of water with a squeeze of lemon juice for a few minutes before baking.
Can I prepare the pears ahead of time?
Yes, you can definitely prepare the pears ahead of time, which makes this recipe perfect for entertaining or meal prepping. You can bake the pears up to 3-4 days in advance and store them in an airtight container in the refrigerator. When ready to serve, simply warm them up as desired (microwave or oven) and then add the fresh Greek yogurt and toppings. This allows for quick assembly when you’re ready to enjoy.