Introduction
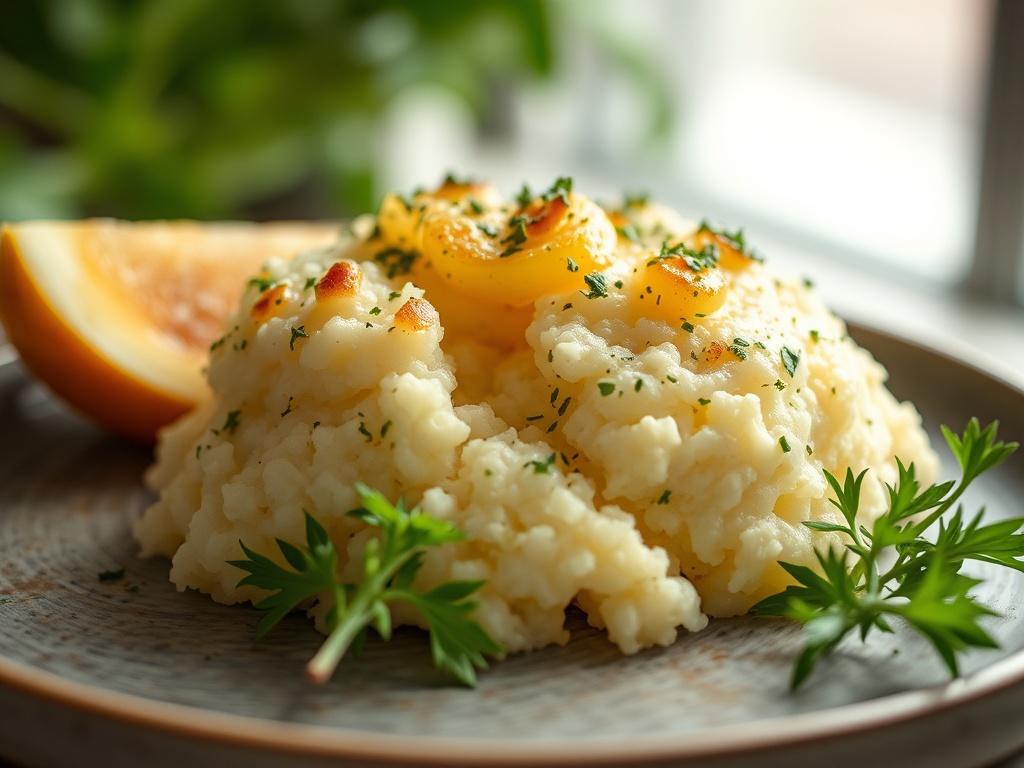
Imagine this: the irresistible aroma of warm, freshly baked bread wafting through your kitchen, drawing everyone closer. You pull apart a piece, and it’s impossibly soft, yielding with a gentle tug. As you bring it to your mouth, the intoxicating scent of garlic and fresh herbs envelops you, promising a burst of flavor that delivers on every front. This isn’t just any bread; this is our “Buttery, fluffy, and bursting with garlic herb goodness” – a truly divine creation that redefines comfort food.
For too long, many of us have settled for dry, flavorless side dishes or store-bought breads that lack that homemade touch. But what if you could effortlessly create something so spectacularly tender, so rich with savory garlic and aromatic herbs, that it becomes the star of any meal? This recipe is your answer. It transforms simple ingredients into an extraordinary experience, offering a solution to blandness and dryness with every buttery, herb-flecked bite.
What we’re about to embark on is a journey to bake the ultimate garlic herb pull-apart bread. It’s a delightful, savory scone-like treat that boasts a pillowy soft interior and a golden, slightly crisp exterior, all infused with an abundance of fragrant garlic and vibrant herbs. You’ll adore its versatility – perfect as a sophisticated side dish for a holiday feast, a comforting accompaniment to a weeknight soup, an impressive appetizer for guests, or simply a delightful snack to enjoy on its own. It’s surprisingly easy to prepare, even for novice bakers, yet delivers results that will impress even the most discerning palate. Get ready to experience pure, unadulterated deliciousness!
Nutritional Information
Per serving (approximate values):
- Calories: 280
- Protein: 8g
- Carbohydrates: 35g
- Fat: 12g
- Fiber: 2g
- Sodium: 350mg
Ingredients
- 4 cups (480g) all-purpose flour, plus more for dusting
- 2 ¼ teaspoons (1 packet) active dry yeast
- 2 tablespoons granulated sugar
- 1 ½ teaspoons fine sea salt
- 1 cup (240ml) warm milk (105-115°F / 40-46°C)
- ½ cup (113g) unsalted butter, melted and slightly cooled, plus 4 tablespoons softened for the herb butter
- 2 large eggs, at room temperature
- 1 head (about 8-10 cloves) fresh garlic, minced very fine
- ½ cup fresh parsley, finely chopped
- ¼ cup fresh chives, finely chopped
- 1 tablespoon fresh rosemary, finely chopped
- 1 tablespoon fresh thyme leaves, finely chopped
- Optional: ¼ cup grated Parmesan cheese
- Optional: 1 tablespoon olive oil (for brushing bowl)
Instructions
- Activate the Yeast: In a large bowl or the bowl of a stand mixer, combine the warm milk and 1 tablespoon of granulated sugar. Sprinkle the active dry yeast over the top. Let it sit for 5-10 minutes until foamy. If it doesn’t foam, your yeast may be old or the milk was too hot/cold.
- Combine Wet Ingredients: To the foamy yeast mixture, add the melted and cooled butter and the two large eggs. Whisk gently to combine.
- Add Dry Ingredients: In a separate medium bowl, whisk together the all-purpose flour, remaining 1 tablespoon of granulated sugar, and salt.
- Form the Dough: Gradually add the dry ingredients to the wet ingredients, mixing with a wooden spoon or the dough hook of a stand mixer on low speed until a shaggy dough forms.
- Knead the Dough: If using a stand mixer, increase the speed to medium-low and knead for 7-10 minutes, until the dough is smooth, elastic, and pulls away from the sides of the bowl. If kneading by hand, turn the dough out onto a lightly floured surface and knead for 10-15 minutes until smooth and elastic. The dough should be slightly sticky but manageable.
- First Rise (Proofing): Lightly grease a clean large bowl with a little olive oil. Place the dough in the bowl, turning it once to coat the top. Cover the bowl tightly with plastic wrap or a clean kitchen towel. Place in a warm, draft-free place for 1 to 1 ½ hours, or until the dough has doubled in size.
- Prepare the Garlic Herb Butter: While the dough is rising, in a small bowl, combine the 4 tablespoons of softened unsalted butter, minced fresh garlic, chopped fresh parsley, chives, rosemary, and thyme. If using, stir in the grated Parmesan cheese. Mix well until all ingredients are evenly distributed.
- Punch Down and Roll Out: Once the dough has doubled, gently punch it down to release the air. Turn the dough out onto a lightly floured surface. Using a rolling pin, roll the dough into a large rectangle, approximately 18×12 inches (45×30 cm).
- Spread Garlic Herb Butter: Evenly spread the garlic herb butter mixture over the entire surface of the rolled-out dough, leaving a small ½-inch border along one of the long edges.
- Shape the Pull-Apart Bread: Starting from the long edge opposite the unbuttered border, tightly roll the dough into a log. Pinch the seam closed to seal.
- Cut and Arrange: Using a sharp knife or bench scraper, cut the dough log into 12-15 equal-sized pieces (about 1 ½ inches thick).
- Second Rise: Lightly grease a 9×13 inch baking dish or a 9-inch round cake pan. Arrange the cut dough pieces snugly in the prepared baking dish, cut-side up. Don’t worry if they are close; they will expand. Cover the dish loosely with plastic wrap or a kitchen towel and let it rise in a warm place for another 30-45 minutes, or until the rolls look puffy and have nearly doubled in size.
- Preheat Oven: While the dough is on its second rise, preheat your oven to 375°F (190°C).
- Bake: Bake for 25-30 minutes, or until the top is golden brown and the internal temperature reaches 200-210°F (93-99°C). If the top starts to brown too quickly, you can loosely tent it with aluminum foil.
- Optional Butter Brush: Once removed from the oven, for extra shine and flavor, you can brush the warm bread with an additional tablespoon of melted butter (plain or with a pinch of garlic powder) immediately.
- Cool and Serve: Let the bread cool in the pan for 5-10 minutes before serving. It’s best enjoyed warm.
Cooking Tips and Variations
- Yeast Temperature is Key: Ensure your milk for activating yeast is precisely 105-115°F (40-46°C). Too hot will kill the yeast, preventing rise; too cold will not activate it. A kitchen thermometer is your best friend here.
- Don’t Over-Knead or Under-Knead: Proper kneading develops gluten, essential for that fluffy texture. Over-kneading can make the dough tough, while under-kneading results in dense bread. Look for a smooth, elastic dough that springs back when gently poked.
- Warm Proofing Environment: A warm, draft-free spot is crucial for proper rising. You can create one by preheating your oven to its lowest setting for a few minutes, then turning it off and placing the covered dough inside.
- Fresh Herbs vs. Dried: For the “bursting with garlic herb goodness” experience, fresh herbs are highly recommended for their vibrant flavor and aroma. If using dried herbs, use about 1/3 the amount of fresh (e.g., 1 teaspoon dried for 1 tablespoon fresh) and consider blooming them briefly in a little melted butter before adding to the softened butter mixture to enhance their flavor.
- Garlic Potency: Always use freshly minced garlic for this recipe. Garlic powder or pre-minced garlic in a jar will not provide the same fresh, pungent flavor.
- Cheesy Garlic Herb Bread: For an extra layer of deliciousness, sprinkle an additional ½ cup of grated mozzarella or cheddar cheese over the garlic herb butter before rolling the dough.
- Spicy Kick: Add a pinch or two of red pepper flakes to the garlic herb butter mixture for a subtle heat.
- Different Herb Combinations: Feel free to experiment with your favorite herbs! Oregano, marjoram, or even a touch of dill can be wonderful additions or substitutions.
- Shaping Alternatives: Instead of cutting into rolls, you can also bake this as a full loaf. After spreading the butter and rolling, simply place the log seam-side down in a greased loaf pan. Adjust baking time accordingly.
- Don’t Over-Bake: Over-baking will dry out your bread and make it less fluffy. Keep an eye on it and remove it from the oven as soon as it’s golden brown and cooked through.
- Post-Bake Butter Brush: Don’t skip the optional butter brush right after baking. It adds moisture, flavor, and a beautiful sheen.
Storage and Reheating
This garlic herb pull-apart bread is truly best enjoyed warm and fresh from the oven, when its buttery, fluffy texture and aromatic flavors are at their peak. However, if you find yourself with leftovers, proper storage and reheating can help maintain its deliciousness.
- Room Temperature: Store any leftover bread in an airtight container or a resealable plastic bag at room temperature for up to 2 days. Ensure it’s completely cooled before storing to prevent condensation, which can make the bread soggy.
- Refrigeration: While not ideal for maintaining optimal texture, if you need to store it longer, you can refrigerate it in an airtight container for up to 4 days. The bread may dry out slightly in the refrigerator.
- Freezing: This bread freezes beautifully! Once completely cooled, wrap individual rolls or the entire loaf tightly in plastic wrap, then again in aluminum foil. Place in a freezer-safe bag. It can be frozen for up to 2-3 months.
- Reheating from Room Temperature: For best results, reheat individual pieces or the whole loaf in a preheated oven or toaster oven at 300°F (150°C) for 5-10 minutes, or until warmed through and soft. You can also microwave for 15-30 seconds per piece, but this may alter the texture slightly.
- Reheating from Frozen: To reheat from frozen, unwrap the bread and place it on a baking sheet. Reheat in a preheated oven at 325°F (160°C) for 15-25 minutes, or until thoroughly thawed and warmed through. For individual rolls, it might take less time.
Frequently Asked Questions
What if my yeast doesn’t foam?
If your yeast mixture doesn’t become foamy after 5-10 minutes, it likely means your yeast is no longer active. This could be due to expired yeast, water that was too hot (killing the yeast), or water that was too cold (not activating it). You’ll need to discard that mixture and start again with fresh yeast and properly warmed milk to ensure your bread rises.
Can I use dried herbs instead of fresh?
While fresh herbs are highly recommended for their vibrant flavor and aroma, you can substitute with dried herbs. As a general rule, use about one-third the amount of dried herbs as fresh. For example, if the recipe calls for 1 tablespoon of fresh rosemary, use 1 teaspoon of dried rosemary. To enhance their flavor, you can “bloom” dried herbs by mixing them into a small amount of melted butter or oil for a few minutes before adding to the main herb butter mixture.
My dough isn’t rising. What went wrong?
Several factors can inhibit dough from rising. The most common reasons include inactive yeast (as mentioned above), an environment that is too cold for proofing, or too much salt in the dough (which can kill yeast). Ensure your proofing area is warm and draft-free, and double-check your yeast and salt measurements. Sometimes, it just needs a little more time, especially in cooler kitchens.
How can I tell when the bread is perfectly baked?
The bread is perfectly baked when it has a beautiful golden-brown crust, especially on top and around the edges. If you have a digital thermometer, the internal temperature should read between 200-210°F (93-99°C). Another good indicator is if the bottom of the bread sounds hollow when tapped. Avoid over-baking to keep the bread moist and fluffy.