Introduction
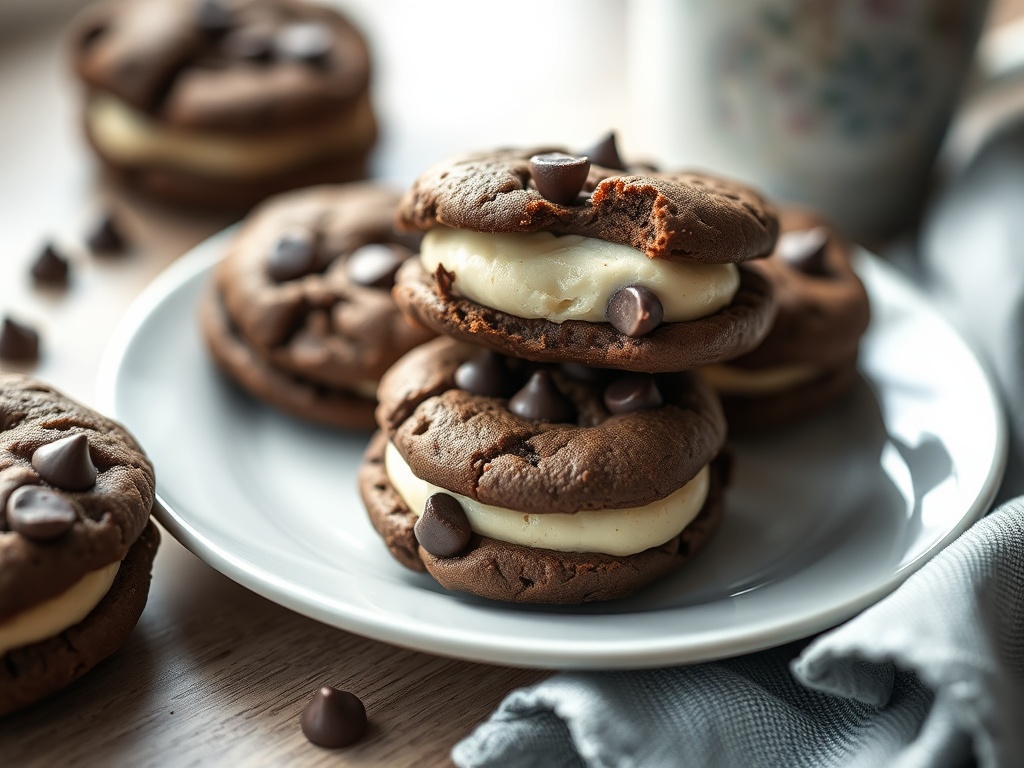
What happens when two dessert titans collide? You get an extraordinary creation that promises to redefine your dessert expectations: Cheesecake Stuffed Chocolate Chip Cookies. Imagine the comforting chewiness of a classic chocolate chip cookie, yielding to a luscious, tangy, and impossibly creamy cheesecake center. This isn’t just a cookie; it’s an experience, a symphony of textures and flavors that will captivate your taste buds from the very first bite. It’s the ultimate hybrid dessert, combining the familiar warmth of a homemade cookie with the sophisticated indulgence of a rich cheesecake, offering the best of both beloved worlds in one irresistible package.
The appeal of this innovative treat lies in its brilliant textural contrast and unexpected delight. You’re not just getting a cookie; you’re embarking on a culinary adventure where crisp edges give way to a soft, gooey interior, which then reveals a cool, smooth, and tangy cheesecake core. It’s a masterful blend of sweet chocolate, rich butter, and the distinctive tang of cream cheese, creating a harmonious flavor profile that is utterly addictive. While the concept might sound complex, the good news is that this dessert is entirely achievable in your home kitchen, promising an incredibly rewarding baking journey and a truly memorable treat.
The individual origins of chocolate chip cookies and cheesecake are rich with culinary history, each a masterpiece in its own right. The chocolate chip cookie, a beloved American invention, has graced countless kitchens and happy occasions since its creation in the 1930s. Cheesecake, with its ancient roots and diverse global interpretations, has long been a symbol of decadent celebration. Our recipe takes these two iconic desserts and beautifully fuses them, offering a chewy chocolate chip cookie exterior that encases a velvety, tangy cheesecake filling, delivering both comfort and surprise in every mouthful.
Nutritional Information
Per serving (approximate values):
- Calories: 320
- Protein: 4g
- Carbohydrates: 40g
- Fat: 17g
- Fiber: 1g
- Sodium: 200mg
Ingredients
- For the Cheesecake Filling:
- 8 ounces (226g) full-fat cream cheese, softened
- 1/4 cup (30g) powdered sugar
- 1 teaspoon vanilla extract
- 1 large egg yolk (optional, for added richness and stability)
- 1/2 teaspoon lemon zest (optional, for brightness)
- For the Chocolate Chip Cookies:
- 1 cup (226g) unsalted butter, softened
- 3/4 cup (150g) granulated sugar
- 3/4 cup (160g) packed light brown sugar
- 2 large eggs, room temperature
- 1 teaspoon vanilla extract
- 2 1/4 cups (270g) all-purpose flour
- 1 teaspoon baking soda
- 1/2 teaspoon salt
- 1 1/2 cups (255g) semi-sweet chocolate chips
Instructions
- Prepare Cheesecake Filling: In a medium bowl, beat the softened cream cheese with a hand mixer or stand mixer on medium speed until completely smooth and lump-free, about 2-3 minutes.
- Add the powdered sugar, vanilla extract, optional egg yolk, and optional lemon zest. Beat on low speed until just combined, then increase to medium and beat until light and fluffy, about 1-2 minutes. Do not overmix.
- Line a small baking sheet or plate with parchment paper. Using a teaspoon or small cookie scoop (about 1 teaspoon capacity), scoop small portions of the cheesecake mixture onto the parchment paper. You should get about 24-30 small portions.
- Using lightly greased fingers, gently flatten each cheesecake portion into a small disc, about 1 inch in diameter and 1/4 inch thick.
- Place the baking sheet with the cheesecake discs into the freezer for at least 30-60 minutes, or until completely firm. This step is crucial for easy handling.
- Prepare Cookie Dough: In a large bowl, cream together the softened unsalted butter, granulated sugar, and brown sugar with a hand mixer or stand mixer on medium-high speed until light and fluffy, about 3-4 minutes. Scrape down the sides of the bowl as needed.
- Beat in the eggs one at a time, mixing well after each addition. Stir in the vanilla extract.
- In a separate medium bowl, whisk together the all-purpose flour, baking soda, and salt.
- Gradually add the dry ingredients to the wet ingredients, mixing on low speed until just combined. Be careful not to overmix.
- Fold in the semi-sweet chocolate chips by hand until evenly distributed.
- Cover the cookie dough bowl with plastic wrap and refrigerate for at least 30 minutes to 1 hour. Chilling the dough helps prevent spreading and enhances flavor.
- Preheat Oven & Prep Baking Sheets: Preheat your oven to 375°F (190°C). Line two large baking sheets with parchment paper.
- Stuffing the Cookies: Remove the chilled cookie dough and frozen cheesecake discs from the refrigerator/freezer.
- Scoop out a portion of cookie dough using a 1.5 to 2-tablespoon cookie scoop. Divide this portion in half.
- Flatten one half of the cookie dough into a disc on your palm. Place one frozen cheesecake disc in the center of the flattened cookie dough.
- Flatten the second half of the cookie dough and place it on top of the cheesecake disc.
- Carefully pinch and seal the edges of the cookie dough around the cheesecake filling, ensuring no part of the cheesecake is exposed. Roll the stuffed dough gently between your palms to form a smooth ball. This thorough sealing is critical to prevent leaks during baking.
- Place the stuffed cookie dough balls about 2 inches apart on the prepared baking sheets.
- Baking: Bake one sheet at a time in the preheated oven for 10-13 minutes, or until the edges are golden brown and the centers are still slightly soft. The cheesecake filling should be set but not hard.
- Cooling: Remove the baking sheets from the oven and let the cookies cool on the sheets for 5-10 minutes. This allows them to set up and prevents them from breaking.
- Carefully transfer the cookies to a wire rack to cool completely. The cheesecake center will firm up as it cools.
- Serve warm for a gooey center or cooled for a firmer cheesecake experience.
Cooking Tips and Variations
Achieving the perfect Cheesecake Stuffed Chocolate Chip Cookie relies heavily on precise execution and attention to detail. Firstly, the firmness of your cheesecake filling is paramount. Ensure the cheesecake discs are thoroughly frozen before stuffing. This makes them much easier to handle and, more importantly, prevents them from melting and oozing out of the cookie dough prematurely during baking. If they’re too soft, they’ll be a sticky mess. Always place them back in the freezer if they start to soften during the stuffing process. Secondly, sealing the cookie dough around the cheesecake filling requires careful attention. Pinch and roll the edges firmly to create a seamless enclosure. Any small gap can lead to the cheesecake bubbling out, which, while still tasty, compromises the aesthetic and the perfect creamy center. Don’t overbake these cookies! The key to a chewy cookie and a creamy cheesecake center is knowing when to pull them from the oven. Look for golden-brown edges and centers that still appear slightly soft. They will continue to set as they cool on the baking sheet. Overbaking will result in dry cookies and a rubbery cheesecake filling, diminishing their irresistible charm. Furthermore, using room temperature ingredients for both the cookie dough and the cheesecake filling is essential for smooth, lump-free mixing and optimal texture. This ensures everything emulsifies correctly, leading to a superior end product. For storage, due to the cream cheese, these cookies must be kept in an airtight container in the refrigerator. They can be gently re-warmed in the microwave for a few seconds to restore some of their gooeyness.
Beyond these essential tips, there are numerous ways to customize and elevate your Cheesecake Stuffed Chocolate Chip Cookies. For the chocolate chips, don’t limit yourself to just semi-sweet; experiment with milk chocolate, dark chocolate, white chocolate, or even a delightful mix of all three for varying levels of sweetness and intensity. To introduce new flavor dimensions to the cheesecake filling itself, consider adding a hint of lemon zest for a bright, citrusy tang that beautifully cuts through the richness, or a touch of almond extract for a subtle nutty note. For a festive twist, a tiny amount of peppermint extract can transform them into a holiday treat. You could also swirl in a small dollop of Nutella or a fruit preserve into the cheesecake filling before freezing the discs for an extra layer of flavor. The cookie dough base itself offers room for creativity. Browning your butter before adding it to the cookie dough creates a deeply nutty, complex flavor that complements the cheesecake wonderfully. Alternatively, incorporating a handful of finely chopped toasted nuts like pecans or walnuts into the cookie dough adds a delightful crunch and richness. For a more decadent finish, a sprinkle of flaky sea salt on top of the cookies before baking enhances the chocolate flavor and adds a gourmet touch. After baking, a dusting of powdered sugar or a delicate drizzle of melted chocolate can elevate their presentation, making them perfect for special occasions or simply to impress. These variations ensure that every batch can be a unique culinary adventure, tailored to your taste and mood.
Storage and Reheating
Due to the perishable nature of the cream cheese filling, these cheesecake stuffed chocolate chip cookies must be stored properly to maintain their freshness and safety. Once completely cooled, transfer the cookies to an airtight container. They should then be stored in the refrigerator. When properly stored in the fridge, they will remain fresh for up to 3-4 days. While they are delicious chilled, many prefer them slightly warm to enjoy the gooey cookie and softened cheesecake center. To reheat, you can place individual cookies in the microwave for 10-20 seconds, or until just warmed through and the cheesecake is soft again. Be careful not to overheat, as this can dry out the cookie or cause the cheesecake to become too runny. Alternatively, you can warm them in a preheated oven at 300°F (150°C) for about 5-7 minutes. For longer storage, the baked cookies can be frozen for up to 1 month. Wrap each cookie individually in plastic wrap, then place them in a freezer-safe airtight container or bag. Thaw them in the refrigerator overnight or at room temperature for a few hours before reheating as desired.
Frequently Asked Questions
What makes the cheesecake filling firm enough to handle?
The key to a firm cheesecake filling that’s easy to stuff is thorough chilling and freezing. After preparing the cheesecake mixture, it’s scooped into small discs and then placed in the freezer for at least 30-60 minutes, or until completely solid. This freezing process ensures the discs hold their shape while you encase them in cookie dough, preventing them from melting and leaking during the stuffing process and initial baking.
Why do my cookies spread too much, and how can I prevent it?
Cookie spread is often caused by warm butter, insufficient flour, or not chilling the dough. To prevent excessive spreading, ensure your butter is softened but not melted. Measure your flour accurately, preferably by weight. Most importantly, chilling the cookie dough for at least 30 minutes to an hour (or even longer) is crucial. Chilled dough has firmer fat, which melts slower in the oven, allowing the cookie to set before spreading too much. Also, avoid placing dough on a warm baking sheet.
Can I make these cookies ahead of time?
Yes, absolutely! You can prepare the cheesecake filling discs and freeze them several days or even weeks in advance. Store them in an airtight container in the freezer. The cookie dough can also be made ahead and refrigerated for up to 3 days or frozen for up to 1 month. If freezing the dough, thaw it in the refrigerator before stuffing. You can also stuff the cookies and then freeze the unbaked stuffed cookie dough balls. When ready to bake, place them directly from the freezer onto a baking sheet and add a few extra minutes to the baking time.