Introduction
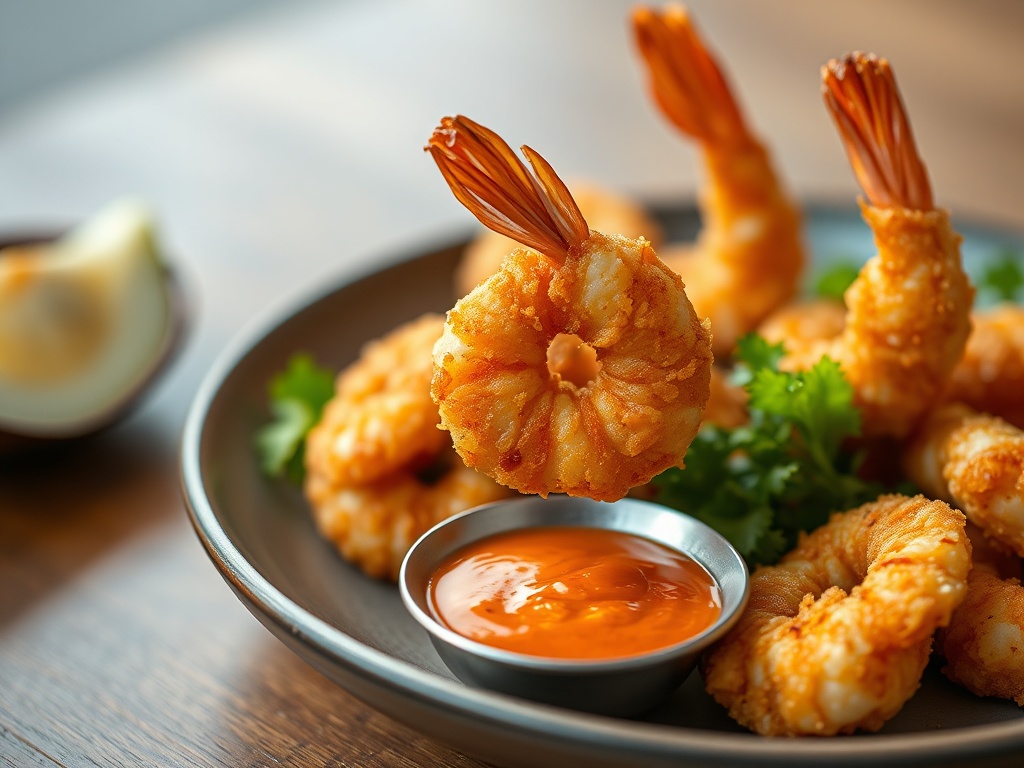
Get ready to tantalize your taste buds with a dish that’s a symphony of textures and flavors: Crispy Honey Butter Shrimp with Sweet Chili Dip! Imagine plump, juicy shrimp, coated in a golden, crunchy crust, then lovingly tossed in a sweet and savory honey-butter glaze that glistens under the light. Each bite offers an irresistible crunch, followed by the succulent sweetness of the shrimp, all perfectly balanced by a hint of garlic and a subtle warmth. This isn’t just an appetizer; it’s an experience, a culinary masterpiece that delivers gourmet taste right to your home kitchen.
What makes this dish truly special is its magical combination of contrasts. The rich, buttery sweetness of the shrimp is expertly cut by the vibrant, tangy kick of our homemade sweet chili dip. This dip isn’t just an afterthought; it’s the perfect counterpoint, adding a refreshing brightness and a delightful zing that makes each bite even more addictive. Whether you’re hosting a dinner party, looking for an impressive yet easy-to-make appetizer, or simply craving a delicious light meal, this recipe is guaranteed to be a showstopper. It’s quick to prepare, incredibly satisfying, and promises to leave everyone asking for more. Prepare to fall in love with your new favorite shrimp recipe!
Nutritional Information
Per serving (approximate values):
- Calories: 420
- Protein: 30g
- Carbohydrates: 35g
- Fat: 20g
- Fiber: 2g
- Sodium: 850mg
Ingredients
For the Crispy Honey Butter Shrimp:
- 1 lb large shrimp (21-25 count), peeled, deveined, tails on or off
- 1/2 cup all-purpose flour
- 1/4 cup cornstarch
- 1 teaspoon paprika
- 1/2 teaspoon garlic powder
- 1/4 teaspoon onion powder
- 1/2 teaspoon salt, plus more to taste
- 1/4 teaspoon black pepper, plus more to taste
- 2 large eggs, beaten
- 1 1/2 cups panko breadcrumbs
- 4 cups neutral oil for frying (e.g., vegetable, canola, peanut)
For the Honey Butter Glaze:
- 1/2 cup unsalted butter
- 1/4 cup honey
- 2 cloves garlic, minced
- 1 tablespoon soy sauce (or tamari for gluten-free)
- 1/4 teaspoon red pepper flakes (optional, for a subtle kick)
For the Sweet Chili Dip:
- 1/2 cup sweet chili sauce (store-bought or homemade)
- 1 tablespoon fresh lime juice
- 1 teaspoon rice vinegar
- 2 tablespoons fresh cilantro, chopped
- 1/2 teaspoon grated fresh ginger (optional)
For Garnish (Optional):
- Sliced green onions
- Toasted sesame seeds
- Extra fresh cilantro, chopped
Instructions
- Prepare the Shrimp: Pat the shrimp thoroughly dry with paper towels. This is crucial for crispness. In a shallow dish, combine the all-purpose flour, cornstarch, paprika, garlic powder, onion powder, 1/2 teaspoon salt, and 1/4 teaspoon black pepper. In a second shallow dish, beat the eggs. In a third shallow dish, place the panko breadcrumbs.
- Set up Dredging Station: Arrange your dishes in an assembly line: seasoned flour mixture, beaten eggs, panko breadcrumbs.
- Dredge the Shrimp: Working in batches, dip each shrimp first into the flour mixture, ensuring it’s fully coated, then shake off any excess. Next, dip it into the beaten egg, letting any extra drip off. Finally, press the shrimp firmly into the panko breadcrumbs, ensuring an even and thorough coating. Place the breaded shrimp on a clean plate or wire rack while you bread the remaining shrimp.
- Prepare the Sweet Chili Dip: In a small bowl, whisk together the sweet chili sauce, fresh lime juice, rice vinegar, chopped cilantro, and optional grated ginger. Taste and adjust seasoning if necessary. Cover and refrigerate until ready to serve.
- Heat the Frying Oil: Pour the neutral oil into a large, heavy-bottomed pot or Dutch oven, ensuring it’s at least 2-3 inches deep. Heat the oil over medium-high heat until it reaches 350-375°F (175-190°C). If you don’t have a thermometer, you can test the oil by dropping a pinch of panko; it should sizzle vigorously and turn golden brown within 15-20 seconds.
- Fry the Shrimp: Carefully add the breaded shrimp to the hot oil, working in batches of 4-6 shrimp to avoid overcrowding the pan and lowering the oil temperature. Fry for 1-2 minutes per side, or until golden brown and cooked through. Shrimp cook quickly, so watch them closely to prevent overcooking.
- Drain the Shrimp: Once golden and crispy, remove the shrimp from the oil using a slotted spoon or spider and transfer them to a wire rack set over a baking sheet lined with paper towels to drain excess oil. Sprinkle lightly with a pinch of salt immediately after frying. Repeat with remaining shrimp.
- Prepare the Honey Butter Glaze: While the shrimp are still warm, melt the butter in a large skillet or pan over medium heat. Add the minced garlic and cook for 30 seconds until fragrant, being careful not to burn it. Stir in the honey, soy sauce, and optional red pepper flakes. Bring the mixture to a gentle simmer, stirring constantly, until well combined and slightly thickened (about 1-2 minutes).
- Glaze the Shrimp: Remove the skillet from the heat. Add the warm, crispy fried shrimp to the honey butter glaze. Gently toss the shrimp to evenly coat them in the luscious glaze. Do this quickly to prevent the coating from becoming soggy.
- Serve: Arrange the glazed crispy honey butter shrimp on a serving platter. Garnish with sliced green onions, toasted sesame seeds, and fresh cilantro, if desired. Serve immediately with the prepared sweet chili dip on the side. Enjoy!
Cooking Tips and Variations
To truly master this Crispy Honey Butter Shrimp, paying attention to a few key details will elevate your results from good to absolutely spectacular. Firstly, moisture is the absolute enemy of crispness. After thawing or rinsing your shrimp, take the time to pat them thoroughly dry with paper towels. Any residual water will steam the breading instead of allowing it to crisp up, leading to a soggy exterior. Secondly, the secret to superior crunch lies in the panko breadcrumbs. Unlike traditional breadcrumbs, panko is lighter, flakier, and absorbs less oil, resulting in that signature airy crispness we’re aiming for. Don’t skimp on pressing the shrimp firmly into the panko to ensure a thick, even coating.
Maintaining the correct oil temperature is paramount when frying. Aim for a consistent 350-375°F (175-190°C). If the oil isn’t hot enough, the breading will absorb too much oil and become greasy. If it’s too hot, the exterior will burn before the shrimp cooks through. Use a thermometer if possible, and adjust your heat as needed. Also, remember the golden rule of frying: never overcrowd the pan. Frying in small batches helps maintain oil temperature and ensures each shrimp has enough space to cook evenly and get perfectly golden. Lastly, when making the honey-butter glaze, be sure to add the shrimp to the glaze while both are still warm. This helps the glaze adhere beautifully and prevents it from seizing up.
For variations, this recipe is wonderfully adaptable. If you’re looking for a healthier alternative to deep-frying, you can easily make these shrimp in an air fryer or oven-baked. For air frying, preheat to 400°F (200°C), lightly spray the breaded shrimp with cooking oil, and air fry for 8-12 minutes, flipping halfway, until golden and cooked. For oven baking, preheat to 400°F (200°C), place the sprayed shrimp on a wire rack over a baking sheet, and bake for 12-18 minutes, flipping halfway. The crispness won’t be quite the same as deep-frying, but it’s still delicious. To adjust the spiciness, increase or decrease the red pepper flakes in the honey-butter glaze or add a dash of sriracha to the sweet chili dip. If you prefer other dips, a simple lemon-garlic aioli or a creamy sriracha mayo would also pair wonderfully. This dish also works beautifully as part of a larger meal; consider serving it alongside steamed jasmine rice or a fresh, vibrant Asian-inspired salad for a complete and satisfying experience.
Storage and Reheating
While Crispy Honey Butter Shrimp is undoubtedly best enjoyed immediately after preparation, you can certainly store and reheat leftovers, though the crispness will diminish slightly. To store, allow any leftover shrimp to cool completely to room temperature. Transfer them to an airtight container and refrigerate for up to 2-3 days. The sweet chili dip can be stored separately in an airtight container in the refrigerator for up to 5 days.
For reheating, avoid the microwave if possible, as it will make the shrimp soggy. The best method for reheating is in an oven or air fryer. Preheat your oven to 350°F (175°C) or your air fryer to 325°F (160°C). Place the shrimp in a single layer on a baking sheet (for the oven) or in the air fryer basket. Reheat for 8-12 minutes in the oven or 5-8 minutes in the air fryer, or until heated through and slightly crisp again. Keep a close eye on them to prevent overcooking. The glaze may re-melt and coat the shrimp again, which is perfectly fine. Serve with fresh sweet chili dip.
Frequently Asked Questions
Can I prepare the shrimp ahead of time?
While the shrimp are best fried and glazed just before serving for maximum crispness, you can prepare the sweet chili dip a day or two in advance and store it in the refrigerator. You can also bread the shrimp a few hours ahead of time; place them on a wire rack over a baking sheet, cover loosely with plastic wrap, and refrigerate. This will help streamline your cooking process when it’s time to fry.
What kind of shrimp should I use?
For the best results, use large (21-25 count) or extra-large (16-20 count) shrimp. These sizes provide a substantial bite and are easier to handle during breading and frying. Fresh or frozen shrimp will work, but if using frozen, ensure they are fully thawed and thoroughly patted dry before proceeding with the recipe. Leaving the tails on is recommended for presentation and as a convenient “handle” for dipping.
My shrimp aren’t getting crispy, what went wrong?
There are a few common culprits. The most likely reason is insufficient drying of the shrimp before breading. Moisture creates steam, which prevents crisping. Another reason could be that your oil temperature was too low, causing the breading to absorb too much oil and become greasy. Overcrowding the pan can also drop the oil temperature significantly, leading to less crispy results. Ensure you’re frying in small batches and maintaining a consistent oil temperature of 350-375°F (175-190°C).
Can I make this recipe gluten-free?
Yes, you can easily adapt this recipe to be gluten-free. For the dredging, use a gluten-free all-purpose flour blend instead of regular flour, and ensure your panko breadcrumbs are certified gluten-free (there are many excellent gluten-free panko options available). For the honey-butter glaze, make sure to use tamari instead of regular soy sauce, as tamari is a gluten-free alternative. Most sweet chili sauces are naturally gluten-free, but always check the label to be sure.