Introduction
The sizzle, the aroma, the luxurious feel – for many, the very mention of Ruth’s Chris Steak House conjures images of an unparalleled dining experience. It’s a place where prime cuts of beef are transformed into culinary masterpieces, served on plates so hot they continue to cook your steak to perfection right at the table. While a trip to Ruth’s Chris is always a treat, what if you could capture that high-end steakhouse magic, that exquisite flavor, and that undeniable “wow” factor right in your own kitchen? This recipe promises to do just that, bringing the legendary Ruth’s Chris Bone-In New York Strip experience directly to your home.
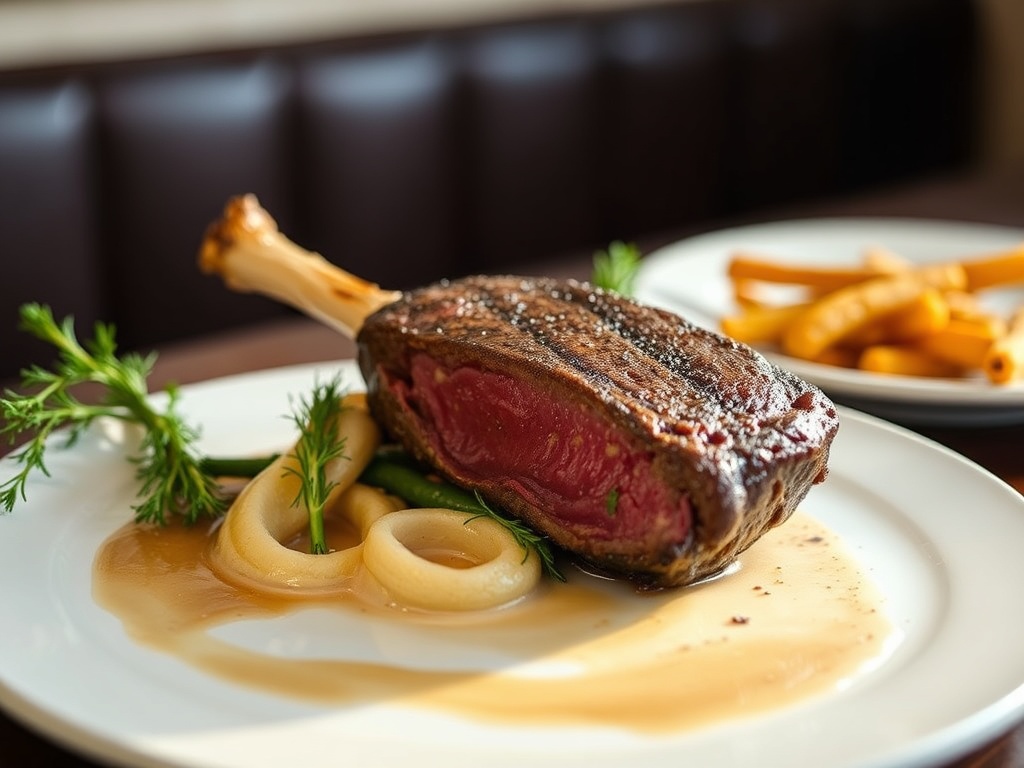
At the heart of the Ruth’s Chris legend lies an unwavering commitment to quality and a deceptively simple philosophy: use the best ingredients, prepare them with precision, and serve them with flair. Their signature Bone-In New York Strip embodies this perfectly. This isn’t just any steak; it’s a testament to the power of high-quality beef, expertly seasoned and cooked to showcase its natural, rich flavors. The bone-in aspect isn’t just for show; it contributes significantly to the steak’s succulence and depth of flavor, making each bite a truly memorable one. We’re about to unlock the secrets to replicating that iconic sizzle and tenderness, proving that you don’t need an 1800°F broiler to achieve steakhouse perfection.
Nutritional Information
Per serving (approximate values for a 20oz bone-in steak, trimmed of excess fat, 4 tbsp butter):
- Calories: 1500-1800
- Protein: 160-180g
- Carbohydrates: 0g
- Fat: 90-120g
- Fiber: 0g
- Sodium: 2500-3500mg
Ingredients
- 1 (1.5-2 inch thick, 18-24 oz) Bone-In USDA Prime or Choice New York Strip Steak
- 2 tablespoons coarse sea salt or Kosher salt (adjust to taste)
- 1 tablespoon freshly ground black pepper (adjust to taste)
- 4 tablespoons unsalted butter
- 2-3 sprigs fresh rosemary or thyme (optional, but recommended)
- 2 cloves garlic, smashed (optional, but recommended)
- 1 tablespoon high smoke point oil (e.g., grapeseed, avocado, canola) if using a stovetop-only method initially
Instructions
- Bring Steak to Room Temperature: Remove the bone-in New York Strip from the refrigerator at least 30-60 minutes before cooking. This crucial step allows the steak to cook more evenly, preventing a cold center and overcooked exterior. Place it on a wire rack set over a baking sheet to allow for air circulation.
- Pat Dry and Season Generously: Using paper towels, thoroughly pat the steak dry on all sides. This removes surface moisture, which is essential for achieving a perfect, crispy sear. Generously season the entire surface of the steak with coarse sea salt or Kosher salt and freshly ground black pepper. Don’t be shy with the seasoning; a thick steak needs a good amount to penetrate and flavor the meat.
- Preheat Oven and Pan/Grill: If using a stovetop-to-oven method, preheat your oven to 450°F (232°C). Place a heavy-bottomed, oven-safe pan (cast iron is highly recommended due to its superior heat retention) in the oven as it preheats. If grilling, preheat your grill to its highest setting, aiming for a consistent high temperature. For a stovetop-only method, place the cast iron pan on the stovetop over high heat for 5-10 minutes until it is smoking slightly.
- Sear the Steak:
- Stovetop-to-Oven Method: Carefully remove the preheated pan from the oven. If using oil, add 1 tablespoon of high smoke point oil to the hot pan and swirl to coat. Immediately place the seasoned steak in the screaming hot pan. Sear for 2-3 minutes per side until a deep, golden-brown crust forms. Use tongs to sear all sides, including the edges, to develop an even crust.
- Grill Method: Place the seasoned steak directly on the hottest part of the grill grates. Sear for 2-4 minutes per side, rotating 90 degrees halfway through each side to create beautiful crosshatch grill marks.
- Finish Cooking:
- Stovetop-to-Oven Method: Once seared, immediately transfer the pan with the steak into the preheated 450°F (232°C) oven. Cook for approximately 5-10 minutes, depending on the thickness of your steak and your desired level of doneness. Use a meat thermometer to check the internal temperature.
- Grill Method: After searing, move the steak to a cooler part of the grill (if available) or lower the heat. Close the lid and continue to cook for an additional 5-10 minutes, flipping occasionally, until it reaches your desired doneness.
- Baste with Butter and Aromatics: Approximately 2-3 minutes before the steak reaches its target temperature, remove the pan (or transfer the steak to a clean pan on the stovetop over medium heat if grilling). Add the unsalted butter, fresh rosemary or thyme sprigs, and smashed garlic cloves to the pan. Once the butter has melted and is sizzling, tilt the pan slightly and use a large spoon to continuously baste the steak with the melted butter and aromatics. Spoon the butter over the steak for 1-2 minutes, ensuring it’s coated in the flavorful liquid. This step adds incredible richness and aroma.
- Rest the Steak: This is arguably the most critical step. Once the steak reaches 5-10°F (3-6°C) below your desired final internal temperature (e.g., 120°F/49°C for medium-rare), carefully remove it from the pan or grill. Transfer the steak to a clean cutting board and tent it loosely with aluminum foil. Let it rest for at least 10-15 minutes for a thick steak. Resting allows the juices, which have been pushed to the center during cooking, to redistribute throughout the meat, resulting in a more tender and juicy steak.
- Slice and Serve: After resting, remove the bone (if desired, it often comes off easily). Slice the steak against the grain into thick, even pieces. For the authentic Ruth’s Chris experience, serve immediately on a preheated plate (you can warm a plate in the oven during the last few minutes of cooking or under hot water). The residual heat from the plate will keep the steak warm and even provide a subtle sizzle, mimicking the steakhouse’s signature presentation.
Cooking Tips and Variations
For the ultimate Ruth’s Chris experience, quality is king. Always opt for USDA Prime if your budget allows, as its superior marbling directly translates to a more tender and flavorful steak. If Prime isn’t accessible, a well-marbled USDA Choice cut will still yield excellent results. Don’t underestimate the power of bringing the steak to room temperature; this simple step ensures even cooking from edge to edge. When seasoning, be bold with your salt and pepper. A thick cut of meat can handle a generous amount, and much of it will create that delicious crust. Patting the steak completely dry before searing is non-negotiable for achieving that perfect, crispy Maillard reaction on the surface.
Mastering the high-heat sear is crucial. Whether you’re using a cast iron pan or a grill, ensure it’s screaming hot before the steak touches the surface. This rapid, intense heat is what creates that coveted crust. Don’t overcrowd your pan if cooking multiple steaks, as this will lower the temperature and steam the meat instead of searing it. A reliable meat thermometer is your best friend here; guesswork can lead to disappointment. Remember, the steak will continue to cook a few degrees after being removed from the heat (carryover cooking), so pull it slightly before your target temperature. And never, ever skip the rest! This allows the muscle fibers to relax and reabsorb the juices, guaranteeing a moist and tender steak.
To elevate your steak even further, consider dry brining. Season the steak with salt hours, or even a day, in advance and leave it uncovered on a wire rack in the refrigerator. This draws moisture out, then reabsorbs it with the salt, leading to a deeper flavor and even better crust. For a gourmet touch, swap out plain unsalted butter for a homemade compound butter. Simply mix softened butter with finely chopped herbs (like chives, parsley, or tarragon) and minced garlic. This can be added during the basting phase or placed directly on the hot steak as it rests. While the stovetop-to-oven method is fantastic, the reverse sear is an alternative for very thick steaks (2 inches or more). This involves cooking the steak slowly in a low oven (around 250°F/120°C) until it’s about 15-20°F below your target internal temperature, then finishing with a super-hot sear on the stovetop or grill. This method can offer even more precise control over doneness.
Storage and Reheating
To store any leftover Ruth’s Chris Bone-In New York Strip, allow the steak to cool completely to room temperature (this prevents condensation and bacterial growth). Once cool, wrap the steak tightly in plastic wrap or aluminum foil, or place it in an airtight container. Store it in the refrigerator for up to 3-4 days. For optimal flavor and texture, it’s best to consume leftovers within 1-2 days.
Reheating steak can be tricky, as it’s easy to dry it out or overcook it. The goal is to gently warm the steak without further cooking it. The best method for reheating a thick cut like a New York Strip is in a low oven. Preheat your oven to 250°F (120°C). Place the leftover steak on a wire rack set over a baking sheet. Heat for 15-25 minutes, or until the internal temperature reaches about 110-120°F (43-49°C) for medium-rare. You can then finish it quickly in a hot pan with a pat of butter for 30-60 seconds per side to revive the crust. Alternatively, for smaller slices, you can quickly pan-fry them in a lightly oiled hot skillet for 1-2 minutes per side until just warmed through. Avoid microwaving, as this tends to make the steak rubbery and tough.
Frequently Asked Questions
What is the best way to get a perfect sear on my steak?
Achieving a perfect sear requires two main things: a very hot cooking surface and a very dry steak. Whether using a cast iron pan or a grill, ensure it is preheated to its absolute maximum temperature for at least 5-10 minutes. Before placing the steak on the hot surface, vigorously pat it dry with paper towels to remove all surface moisture. Moisture creates steam, which prevents browning. Use a high smoke point oil if cooking in a pan, and don’t crowd the pan, as this will drop the temperature. Let the steak sear undisturbed for 2-3 minutes per side to develop a deep, dark crust.
Why is resting the steak so important, and how long should I rest it for?
Resting the steak after cooking is crucial for a juicy and tender result. During cooking, the muscle fibers contract, pushing the internal juices towards the center of the steak. If you cut into it immediately, these juices will rush out, leaving you with dry meat. Resting allows the muscle fibers to relax and the juices to redistribute evenly throughout the steak. For a thick bone-in New York Strip (1.5-2 inches), you should rest it for at least 10-15 minutes. For thinner steaks, 5-7 minutes might suffice. Always tent the steak loosely with foil during resting to keep it warm without steaming the crust.
Can I achieve the Ruth’s Chris “sizzle plate” effect at home?
Absolutely! The Ruth’s Chris signature “sizzle plate” is a key part of their experience, keeping the steak hot and even continuing to cook it slightly at the table. To replicate this at home, preheat an oven-safe ceramic or cast iron plate in your oven during the last 10-15 minutes of your steak’s cooking time (around 400-450°F or 200-230°C). Be extremely careful when handling the hot plate. Once your steak is rested and sliced, transfer it directly onto the preheated plate. You can even add a small pat of butter to the hot plate just before placing the steak on it for an extra sizzle and rich aroma, just like they do at the restaurant.