Introduction
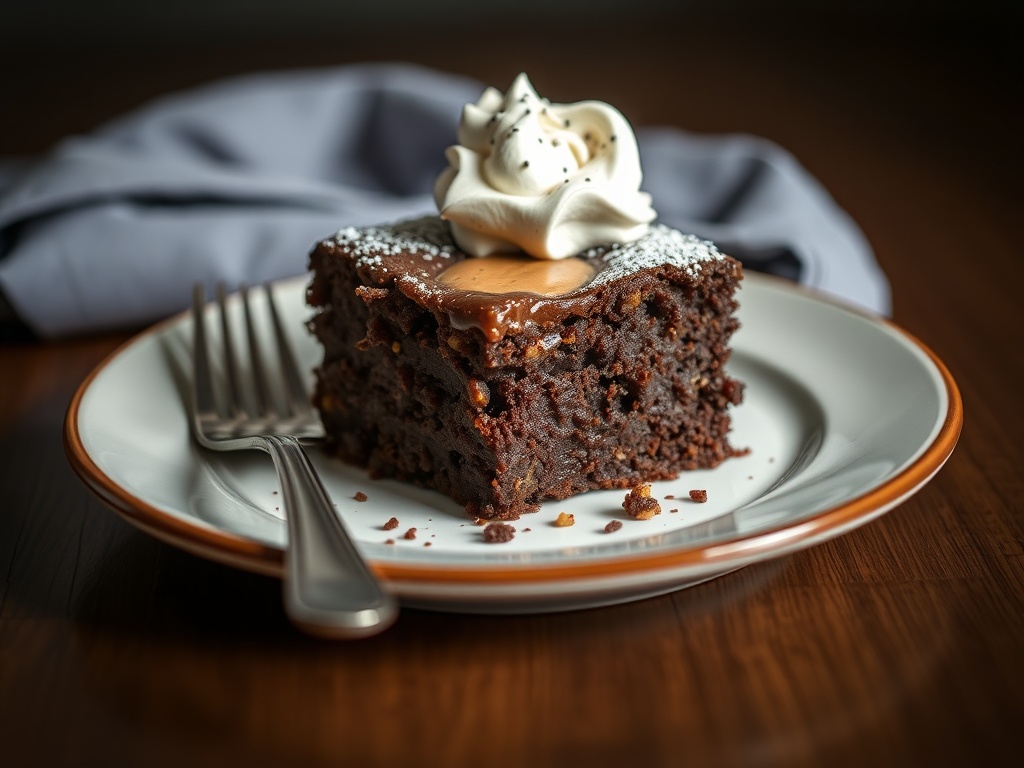
Prepare yourselves, dessert lovers, for a truly decadent experience that will tantalize your taste buds and leave you craving just one more slice: the Ultimate Chocolate Peanut Butter Poke Cake! Imagine a rich, moist chocolate cake, generously infused with a creamy, dreamy peanut butter filling that seeps into every pore, creating an explosion of flavor and an unbelievably tender texture. Then, just when you think it couldn’t get any better, it’s crowned with a silky, glossy chocolate ganache, making each bite an absolute symphony of chocolate and peanut butter. This isn’t just a cake; it’s a celebration of two of the most beloved flavors in the culinary world, coming together in perfect harmony.
What makes this particular poke cake stand out from the crowd? It’s all about the perfect balance of richness and ease. While it tastes like a dessert from a gourmet bakery, its preparation is surprisingly straightforward, making it accessible for even novice bakers. The “poke” technique is brilliant, allowing the luscious peanut butter filling to penetrate deep into the chocolate cake, ensuring moisture and flavor in every single forkful. It’s an instant crowd-pleaser, perfect for potlucks, birthdays, holidays, or simply as an indulgent treat for a quiet evening at home. The combination of its irresistible allure and its simple execution makes this recipe a true gem in your dessert repertoire.
The poke cake itself has a fascinating history, emerging as a popular dessert in the 1970s, famously pioneered by Jell-O. The idea was simple yet revolutionary: bake a cake, poke holes in it, and pour a liquid (like gelatin or pudding) over the top to infuse it with flavor and moisture. This ingenious method quickly caught on, leading to countless delicious variations. Our version elevates this classic concept by pairing the timeless chocolate cake with the universally adored peanut butter, creating a flavor combination that has delighted generations. It’s a testament to how simple techniques can yield extraordinary results, transforming everyday ingredients into a truly unforgettable dessert that is both nostalgic and utterly modern in its appeal.
Nutritional Information
Per serving (approximate values):
- Calories: 580
- Protein: 12g
- Carbohydrates: 65g
- Fat: 35g
- Fiber: 3g
- Sodium: 420mg
Ingredients
- For the Chocolate Cake:
- 1 (15.25 ounce) box chocolate cake mix (such as Duncan Hines or Betty Crocker)
- 3 large eggs
- 1/2 cup vegetable oil
- 1 1/4 cups milk (whole milk recommended for richness)
- 1/4 cup unsweetened cocoa powder (for extra richness, optional)
- For the Peanut Butter Filling:
- 1 (14 ounce) can sweetened condensed milk
- 1 cup creamy peanut butter
- 1/4 cup milk
- For the Chocolate Ganache/Topping:
- 1 cup semi-sweet chocolate chips
- 1/2 cup heavy cream
- 2 tablespoons unsalted butter
- Optional Garnishes:
- 1/2 cup chopped roasted peanuts
- 1/2 cup mini Reese’s peanut butter cups, chopped
- Chocolate shavings
- Whipped cream
Instructions
- Prepare the Chocolate Cake: Preheat your oven to 350°F (175°C). Lightly grease and flour a 9×13 inch baking pan, or spray with baking spray with flour.
- In a large mixing bowl, combine the chocolate cake mix, eggs, vegetable oil, 1 1/4 cups milk, and optional cocoa powder. Beat with an electric mixer on low speed for 30 seconds, then increase to medium speed and beat for 2 minutes, scraping down the sides of the bowl as needed, until the batter is smooth.
- Pour the cake batter evenly into the prepared baking pan.
- Bake for 30-35 minutes, or until a wooden skewer or toothpick inserted into the center comes out clean.
- Remove the cake from the oven and place it on a wire rack to cool for 10-15 minutes. It should still be warm.
- Poke the Cake: While the cake is still warm, use the round handle of a wooden spoon or a large skewer to poke holes evenly over the entire surface of the cake. Aim for holes about 1 inch apart, going almost all the way to the bottom of the pan.
- Prepare the Peanut Butter Filling: In a medium bowl, whisk together the sweetened condensed milk, creamy peanut butter, and 1/4 cup milk until thoroughly combined and smooth.
- Pour the Filling: Carefully pour the peanut butter filling over the warm, poked cake, ensuring it seeps into all the holes. Use an offset spatula or the back of a spoon to gently spread any excess filling evenly over the top of the cake.
- Place the cake in the refrigerator and chill for at least 1 hour, or until the peanut butter filling has set.
- Prepare the Chocolate Ganache: In a small saucepan over medium heat, gently warm the heavy cream until it just begins to simmer around the edges (do not bring to a rolling boil).
- Remove the cream from the heat and immediately pour it over the chocolate chips and unsalted butter in a heatproof bowl. Let it sit undisturbed for 5 minutes to allow the chocolate to melt.
- After 5 minutes, whisk the mixture gently from the center outwards until the chocolate is completely melted, smooth, and glossy.
- Top the Cake: Once the cake has chilled and the peanut butter filling is set, pour the warm (but not hot) chocolate ganache evenly over the top of the cake, spreading it gently with an offset spatula if needed.
- Garnish and Chill: If desired, sprinkle with chopped peanuts, chopped Reese’s peanut butter cups, or chocolate shavings.
- Return the cake to the refrigerator and chill for at least 2 more hours, or preferably overnight, to allow the ganache to firm up and the flavors to fully meld.
- Slice and serve chilled.
Cooking Tips and Variations
For the ultimate moist cake, do not overmix your cake batter. Mix until just combined, as overmixing can develop the gluten too much, leading to a tougher texture. When baking, a slightly underbaked cake is often superior to an overbaked one in terms of moisture. Keep a close eye on it during the final minutes of baking. The quality of your ingredients truly shines through in this recipe. Invest in a good quality cocoa powder for the cake and chocolate chips for the ganache; it makes a noticeable difference in the depth of flavor. For the peanut butter, stick to a creamy, traditional brand rather than natural peanut butter, as the oils in natural varieties can separate and affect the consistency of the filling.
The poking technique is crucial: use the handle of a wooden spoon (about 1/2 inch in diameter) for perfect, consistent holes. Make sure your holes go almost all the way to the bottom of the cake, but not through it, to ensure maximum absorption of the filling. Space them about 1 inch apart for even distribution. Do not skip the cooling and chilling times! Allowing the cake to cool slightly before poking prevents it from falling apart, and chilling after the peanut butter filling is added is essential for it to set properly. The final chill after the ganache ensures a firm, sliceable cake with a perfectly set topping. Patience truly is a virtue here, as these steps guarantee the best texture and flavor.
This recipe is wonderfully versatile. For a different base, try a yellow cake mix or even a dark chocolate fudge cake mix. You can also enhance the chocolate ganache by adding a teaspoon of espresso powder for a deeper chocolate flavor, a splash of vanilla extract, or even a hint of cayenne pepper for a subtle spicy kick. If you’re a fan of crunchy textures, use crunchy peanut butter in the filling, or add crushed pretzels to the top for a salty-sweet contrast. For a festive touch, make mini poke cakes by baking the chocolate cake in muffin tins, poking holes in each cupcake, and then topping with the filling and ganache. Another fun variation involves swirling a bit of melted marshmallow fluff into the peanut butter filling for an even creamier, fluffier texture. Don’t be afraid to experiment with your favorite chocolate and peanut butter combinations!
Storage and Reheating
To store your magnificent Chocolate Peanut Butter Poke Cake, ensure it is completely cooled and the ganache has fully set. Then, cover the baking pan tightly with plastic wrap or transfer individual slices to an airtight container. Store the cake in the refrigerator. This cake tastes absolutely divine when served chilled, as the flavors have more time to meld and the textures firm up beautifully. It will remain fresh and delicious in the refrigerator for up to 4-5 days. Beyond that, the cake might start to dry out slightly, though the filling helps maintain moisture.
While this cake is best enjoyed chilled, if you prefer a slightly softer ganache or a less firm cake texture, you can let individual slices sit at room temperature for about 15-20 minutes before serving. However, for food safety and optimal texture, it’s generally best to keep the entire cake refrigerated. Reheating is typically not recommended for this type of cake, as the ganache and filling are designed to be served chilled or at cool room temperature. Microwaving would melt the ganache and potentially alter the texture of the filling and cake in an undesirable way. If you find the cake has become a little dry after a few days, a quick trick is to serve it with a dollop of fresh whipped cream or a scoop of vanilla ice cream, which adds moisture and a delightful contrast in temperature and texture.
For longer storage, this Chocolate Peanut Butter Poke Cake can be frozen. To freeze, first ensure the cake is completely chilled and the ganache is firm. You can freeze the entire cake in its pan (well-wrapped in plastic wrap and then foil) or cut it into individual slices. For slices, wrap each piece tightly in plastic wrap, then place them in an airtight freezer-safe container or freezer bag. The cake can be stored in the freezer for up to 1-2 months. To thaw, transfer the frozen cake or individual slices to the refrigerator and let them thaw overnight. Avoid thawing at room temperature, as this can lead to condensation and affect the ganache texture. Once thawed, serve chilled as usual. Freezing can sometimes slightly alter the texture of the cake, making it a bit denser, but it will still be incredibly delicious.
Frequently Asked Questions
Can I make this cake ahead of time for a party?
Absolutely! This Chocolate Peanut Butter Poke Cake is an excellent make-ahead dessert. In fact, it often tastes even better the next day after the flavors have had ample time to meld and the filling and ganache have fully set. You can prepare the entire cake, including the ganache and garnishes, up to 2 days in advance. Just ensure it’s stored properly in an airtight container in the refrigerator. This allows you to focus on other party preparations without worrying about the dessert on the day of your event.
What can I use if I don’t have a wooden spoon handle to poke holes?
If you don’t have a wooden spoon with a round handle, there are several alternatives you can use to poke holes in your cake. A chopstick works wonderfully, as does a large skewer or even the blunt end of a clean, sturdy kitchen utensil. The key is to use something that creates holes about 1/2 inch in diameter, ensuring they are deep enough to reach almost the bottom of the cake without tearing through it. Uniformity in hole size and spacing helps ensure even distribution of the delicious peanut butter filling throughout the cake.
My ganache isn’t smooth and glossy. What went wrong?
There are a few common reasons why ganache might not turn out smooth. The most frequent culprit is overheating the cream or the chocolate. If the cream gets too hot, it can scorch the chocolate. Conversely, if the cream isn’t hot enough, the chocolate won’t melt properly. Make sure the cream is just simmering, then pour it over the chocolate chips and let it sit for the full 5 minutes before whisking. Another issue could be whisking too vigorously or too soon, which can introduce air and make it seize. If your ganache looks grainy or separated, try adding a tiny bit more warm cream (1 teaspoon at a time) and whisking gently until it comes back together. Patience is key when making ganache!
Can I use natural peanut butter for the filling?
While you might be tempted to use natural peanut butter for a healthier option, it’s generally not recommended for this particular recipe’s filling. Natural peanut butter tends to separate more readily due to its higher oil content and lack of stabilizers, which can lead to a less consistent and potentially oily texture in the filling. For the best results – a smooth, creamy, and stable peanut butter layer – stick to a traditional, processed creamy peanut butter that contains added sugar and oils. This will ensure your filling sets properly and has the desired rich texture that perfectly complements the chocolate cake.