Introduction
Remember those iconic, molten-hot pockets of cheesy pizza goodness you’d grab for a quick snack or a last-minute dinner? What if we told you that you could recreate that magic, and even elevate it, right in your own kitchen? Welcome to the wonderful world of Homemade Easy Cheesy Pizza Pockets! This isn’t just a recipe; it’s an invitation to a customizable, convenient, and utterly delicious experience that will quickly become a family favorite. Forget the freezer aisle versions with their mystery fillings and questionable crusts. Our homemade pizza pockets offer a fresh, flavorful, and incredibly satisfying alternative that puts you in control of every delicious bite.
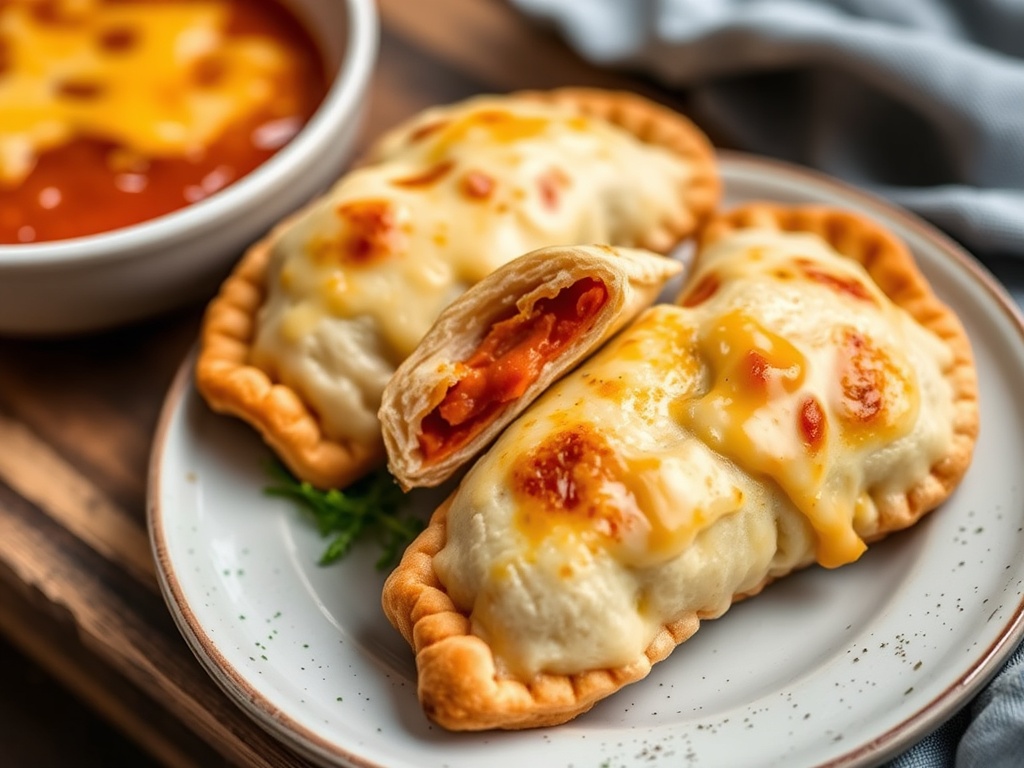
The allure of homemade pizza pockets lies in their perfect blend of nostalgia, convenience, and endless customization. For busy families, students needing a quick bite, snack enthusiasts, or even party hosts looking for an easy crowd-pleaser, these pockets are a game-changer. They solve the universal craving for a quick, satisfying, and comforting meal or snack without the fuss of making a whole pizza. Imagine a golden, flaky crust encasing a warm, gooey blend of your favorite sauce, melty cheese, and delicious fillings – all baked to perfection in a portable package. It’s a versatile canvas for your culinary creativity, ready to be filled with anything your heart desires.
Get ready to discover how incredibly easy it is to whip up a batch (or two!) of these delectable pockets. We’ll guide you through the simple steps, from choosing your dough to sealing in all that cheesy goodness, ensuring a delicious outcome every time. This recipe is designed to be approachable for cooks of all skill levels, emphasizing time-saving techniques and cost-effectiveness. Not only will you enjoy superior flavor and texture compared to store-bought options, but you’ll also have the peace of mind knowing exactly what ingredients are going into your meal. So, let’s roll up our sleeves and dive into crafting the ultimate Homemade Easy Cheesy Pizza Pockets – your new go-to for a quick, customizable, and unbelievably tasty treat!
Nutritional Information
Per serving (approximate values):
- Calories: 320
- Protein: 15g
- Carbohydrates: 28g
- Fat: 16g
- Fiber: 2g
- Sodium: 650mg
Ingredients
- 1 (8-ounce) can refrigerated crescent roll dough (such as Pillsbury) OR 1 sheet puff pastry, thawed OR 1 lb pre-made pizza dough
- ½ cup marinara or pizza sauce
- 1 ½ cups shredded mozzarella cheese
- ½ cup desired fillings (e.g., ¼ cup mini pepperoni, ¼ cup diced cooked ham, or ¼ cup sautéed bell peppers and onions)
- 1 large egg, beaten (for egg wash, optional)
- ½ teaspoon Italian seasoning (optional)
- Pinch of garlic powder (optional)
- All-purpose flour, for dusting (if using pizza dough)
Instructions
- Preheat your oven to 375°F (190°C). Line a large baking sheet with parchment paper or a silicone baking mat for easy cleanup and to prevent sticking.
- If using crescent roll dough: Unroll the crescent roll dough onto the prepared baking sheet. Do not separate the triangles. Pinch together the seams of the dough to form two rectangular sheets. You can gently press and stretch each rectangle to be slightly larger, about 8×6 inches.
- If using puff pastry: Unfold the thawed puff pastry sheet onto a lightly floured surface or directly onto the prepared baking sheet. You may need to gently roll it out slightly to an even thickness, about 10×10 inches.
- If using pre-made pizza dough: Lightly flour your work surface. Roll out the pizza dough into a large rectangle, approximately 10×12 inches, or into two smaller rectangles, about 8×6 inches each.
- Divide your chosen dough (crescent roll, puff pastry, or pizza dough) into 4-6 equal rectangles. For crescent rolls, you’ll have two larger rectangles, cut each in half or thirds. For puff pastry or pizza dough, you can cut into 4 large squares or 6 smaller rectangles, depending on your desired pocket size.
- On one half of each dough rectangle, spread 1-2 tablespoons of marinara or pizza sauce, leaving a ½-inch border along the edges. Be careful not to over-sauce, as this can make the pockets soggy.
- Sprinkle about ¼ to ⅓ cup of shredded mozzarella cheese over the sauce on each dough rectangle.
- Evenly distribute your chosen fillings (pepperoni, cooked sausage, diced veggies, etc.) over the cheese. Again, do not overfill, as this can lead to bursting during baking.
- Optional: If desired, sprinkle a pinch of Italian seasoning and/or garlic powder over the fillings for extra flavor.
- Carefully fold the empty half of the dough over the filled half, creating a pocket. Gently press down around the edges to seal.
- Using the tines of a fork, crimp the edges of each pocket firmly to create a secure seal. This not only looks nice but also helps prevent the fillings from leaking out during baking.
- If using an egg wash (recommended for a golden, shiny crust): In a small bowl, whisk the beaten egg with 1 teaspoon of water. Brush the top of each pizza pocket with the egg wash. This helps achieve a beautiful golden-brown color and a slightly crispier finish.
- Using a sharp knife or kitchen shears, cut 2-3 small slits on the top of each pocket. This allows steam to escape during baking, preventing the pockets from puffing too much and bursting.
- Carefully transfer the pizza pockets to the prepared baking sheet, ensuring they are spaced at least 1 inch apart.
- Bake for 12-18 minutes, or until the dough is golden brown and puffed, and the cheese is melted and bubbly. Baking time may vary slightly depending on your oven and the type of dough used (crescent rolls typically bake faster than puff pastry or pizza dough). Rotate the baking sheet halfway through baking if your oven tends to bake unevenly.
- Once baked, remove the pizza pockets from the oven. Let them cool on the baking sheet for 5-10 minutes before serving. This cooling time is crucial as the insides will be extremely hot, preventing burns and allowing the cheese to set slightly.
- Serve warm with extra marinara sauce, ranch dressing, or garlic butter for dipping, if desired. Enjoy your homemade, easy, cheesy pizza pockets!
Cooking Tips and Variations
Achieving the perfect pizza pocket is all about a few key techniques and knowing how to make the recipe your own. First and foremost, resist the urge to overfill your pockets. While it’s tempting to load them up, too much filling can lead to pockets bursting open in the oven, creating a gooey mess. Aim for a balanced amount of sauce, cheese, and fillings so that you can easily seal the edges. Speaking of sealing, a proper crimp with a fork is your best friend. For an extra secure seal, you can lightly moisten the edges of the dough with a little water or egg wash before folding. This acts like a glue, ensuring everything stays tucked inside. Don’t forget those small slits on top – they’re not just for decoration! These vents allow steam to escape, preventing your pockets from turning into doughy balloons and ensuring even baking. For a beautiful golden crust and a slightly richer flavor, an egg wash brushed over the top before baking makes a world of difference, especially with puff pastry or pizza dough.
The beauty of pizza pockets lies in their incredible versatility. Consider this recipe a playground for your taste buds! For the meat lovers, go wild with combinations like mini pepperoni, cooked and crumbled Italian sausage, crispy bacon bits, or even diced cooked chicken. Think beyond traditional pizza toppings – buffalo chicken with a hint of blue cheese, BBQ pulled pork, or even a spicy chorizo and jalapeño mix can be fantastic. Veggie enthusiasts have a bounty of options: sautéed mushrooms, bell peppers, and onions are classics, but don’t shy away from spinach (ensure it’s well-drained to avoid excess moisture), black olives, artichoke hearts, or sun-dried tomatoes. For a gourmet twist, try a pesto chicken pocket, or a “white pizza” version with ricotta, garlic, and spinach. The cheese blend is another area for customization; alongside mozzarella, provolone adds a nice stretch and mild flavor, while a sprinkle of Parmesan or a sharp cheddar can boost the savoriness. For a spicier kick, add a pinch of red pepper flakes to your sauce or fillings.
Dough alternatives can dramatically change the texture of your pockets. While crescent roll dough is wonderfully quick and creates a soft, slightly flaky crust, puff pastry elevates the experience with its incredibly light and buttery layers. Homemade pizza dough offers a more traditional, chewy pizza crust. If you’re feeling adventurous, you can even try a biscuit dough for a thicker, more bready pocket. And no pizza pocket is complete without a delicious dipping sauce! Beyond classic marinara, consider a creamy ranch, a zesty garlic butter (melted butter with garlic powder and parsley), or even a spicy sriracha mayo. Don’t forget dietary adaptations: gluten-free crescent rolls or pizza dough are readily available, and dairy-free cheese alternatives work perfectly. For plant-based fillings, beyond the usual veggies, consider seasoned plant-based crumbles or vegan pepperoni. The possibilities are truly endless, allowing you to tailor each batch to your exact cravings and dietary needs.
Storage and Reheating
Homemade pizza pockets are fantastic for meal prep and make-ahead convenience, thanks to their freezer-friendly nature. To store leftover cooked pizza pockets, allow them to cool completely to room temperature. Once cooled, place them in an airtight container or a freezer-safe bag. They will keep in the refrigerator for up to 3-4 days. For longer storage, you can freeze them. Arrange the cooled pockets in a single layer on a baking sheet and freeze for 1-2 hours until solid. This prevents them from sticking together. Once frozen, transfer them to a freezer-safe bag or container, removing as much air as possible. Frozen pizza pockets will maintain their quality for up to 2-3 months.
Reheating your pizza pockets properly is key to bringing back that delicious, crispy texture. While a microwave will heat them through quickly, it often results in a softer, sometimes chewy crust. For the best results, we recommend using an oven or an air fryer. To reheat in the oven, preheat it to 350°F (175°C). Place the pockets directly on a baking sheet and bake for 10-15 minutes if refrigerated, or 15-25 minutes if frozen, until heated through and the crust is crispy. If reheating from frozen, you don’t need to thaw them first. For an air fryer, preheat it to 325°F (160°C). Place the pockets in a single layer in the air fryer basket and cook for 5-8 minutes (refrigerated) or 8-12 minutes (frozen), flipping halfway through, until hot and crispy. Always ensure the internal temperature reaches a safe 165°F (74°C) before serving. The air fryer is particularly excellent for achieving that desired crispy exterior.
Frequently Asked Questions
Can I prepare the pizza pockets ahead of time and bake them later?
Yes, absolutely! You can assemble the pizza pockets up to 24 hours in advance. After assembling and sealing, place them on a parchment-lined baking sheet, cover loosely with plastic wrap, and refrigerate. When ready to bake, remove them from the refrigerator about 15-20 minutes before baking to allow them to come closer to room temperature, then bake as directed. You may need to add a few extra minutes to the baking time.
What if my pizza pockets burst open during baking?
Pockets usually burst if they are overfilled or if the edges aren’t sealed properly, allowing steam to build up inside without an escape route. To prevent this, make sure not to overstuff with fillings, firmly crimp the edges with a fork, and always cut 2-3 small slits on the top of each pocket before baking to allow steam to vent. If one does burst, it’s usually still perfectly delicious, just a little messier!
Can I use homemade pizza dough for this recipe?
Definitely! Homemade pizza dough works wonderfully and offers a more authentic, chewy crust compared to crescent rolls or puff pastry. If using homemade dough, roll it out thinly, similar to how you would for a regular pizza, and then cut it into rectangles for your pockets. The baking time might be slightly longer (around 18-25 minutes), so keep an eye on them until they are golden brown and cooked through.