Old-Fashioned Rice Pudding: A Timeless Comfort Food
Introduction
There are some dishes that transcend mere sustenance, reaching deep into our collective memory to evoke warmth, nostalgia, and the simple joy of home. Old-fashioned rice pudding is undoubtedly one of them. This humble yet profoundly satisfying dessert, with its creamy texture and subtly sweet embrace, has graced tables for centuries across countless cultures. It’s a culinary hug in a bowl, a dish that whispers tales of childhood kitchens, family gatherings, and the comforting rhythm of slow cooking. Its enduring appeal lies in its beautiful simplicity, transforming a few basic pantry staples into something truly magical.
What makes this particular rendition “old-fashioned” isn’t a secret ingredient or an elaborate technique, but rather a reverence for tradition. It’s about letting quality ingredients shine, allowing the rice to slowly absorb rich dairy, and infusing it with classic flavors like vanilla and cinnamon. This isn’t a dessert that demands attention with flashy presentation or exotic components; instead, it wins hearts with its honest, unpretentious deliciousness. Whether you remember it from your grandmother’s kitchen or are discovering its charms for the first time, this rice pudding promises a return to comfort, a taste of history, and a truly satisfying experience that reminds us why some foods simply never go out of style.
Beyond its nostalgic charm, old-fashioned rice pudding is incredibly versatile. It can be a hearty breakfast to kickstart a chilly morning, a satisfying afternoon snack, or the perfect soothing dessert after any meal. Its adaptability to be served warm, at room temperature, or chilled makes it a year-round favorite, equally comforting on a winter’s night as it is refreshing on a summer afternoon. This recipe celebrates that versatility, offering a foundational method that is both accessible for novice cooks and deeply satisfying for seasoned home chefs looking to recreate a classic.
Nutritional Information
Per serving (approximate values for 1/6th of the recipe):
- Calories: 340 kcal
- Protein: 10g
- Carbohydrates: 55g
- Fat: 9g
- Fiber: 1g
- Sodium: 120mg
Ingredients
- 1 cup short-grain white rice (such as Arborio or sushi rice)
- 6 cups whole milk
- ½ cup granulated sugar (or to taste)
- ¼ teaspoon salt
- 1 teaspoon pure vanilla extract
- ½ teaspoon ground cinnamon, plus extra for dusting
- 2 large eggs (optional, for extra richness)
- Optional toppings: fresh berries, toasted nuts, whipped cream, maple syrup, raisins
Instructions
- Prepare the Rice: While some recipes suggest rinsing rice, for this old-fashioned pudding, we want to retain the starch. So, there’s no need to rinse the rice. If you prefer, a quick rinse can help prevent sticking, but it’s not essential for this method.
- Combine Ingredients: In a heavy-bottomed 3-quart saucepan, combine the unrinsed short-grain rice, 6 cups of whole milk, ½ cup granulated sugar, and ¼ teaspoon of salt. Using a heavy-bottomed pan is crucial here, as it helps distribute heat evenly and significantly reduces the risk of scorching the milk, which can easily happen with thinner pans.
- Bring to a Simmer: Place the saucepan over medium-high heat. Stir the mixture occasionally to prevent the rice from sticking to the bottom and to help dissolve the sugar. Bring the mixture to a gentle simmer. Do not let it come to a rolling boil, as this can cause the milk to boil over and the rice to cook too quickly on the outside while remaining hard on the inside.
- Reduce Heat and Cook: Once the mixture reaches a gentle simmer, immediately reduce the heat to the lowest setting. The goal is a very slow, gentle simmer, where you see only tiny bubbles occasionally breaking the surface. This “low and slow” approach is the secret to achieving that wonderfully creamy, tender texture without burning.
- Slow Simmer and Stir: Continue to cook the rice pudding on low heat for 45 to 60 minutes. During this time, you must stir the pudding frequently, especially as it thickens towards the end of the cooking process. Stirring every 5-10 minutes initially, and then every 2-3 minutes during the last 15-20 minutes, will prevent the rice from sticking to the bottom and forming a crust. It also helps to release the starches from the rice evenly, contributing to the creamy consistency.
- Check for Doneness: The pudding is ready when the rice is tender and has absorbed most of the milk, and the mixture has thickened considerably. It should be creamy but still a bit loose, as it will continue to thicken as it cools. Test a grain of rice to ensure it’s soft and cooked through.
- Temper and Add Eggs (Optional): If you are using eggs for extra richness and a more custard-like texture, this is the time to add them. In a small bowl, whisk the two large eggs until well combined. Slowly ladle about ½ cup of the hot rice pudding into the whisked eggs while whisking continuously. This process, called tempering, gradually raises the temperature of the eggs and prevents them from scrambling when added to the hot pudding.
- Incorporate Eggs and Flavorings: Pour the tempered egg mixture back into the saucepan with the rice pudding. Stir vigorously for 1-2 minutes over low heat to fully incorporate the eggs and allow them to thicken the pudding. Remove the saucepan from the heat. Stir in the 1 teaspoon of pure vanilla extract and ½ teaspoon of ground cinnamon.
- Rest and Thicken: Cover the saucepan and let the rice pudding stand for 10-15 minutes off the heat. This resting period allows the flavors to meld and the pudding to thicken further as it cools slightly.
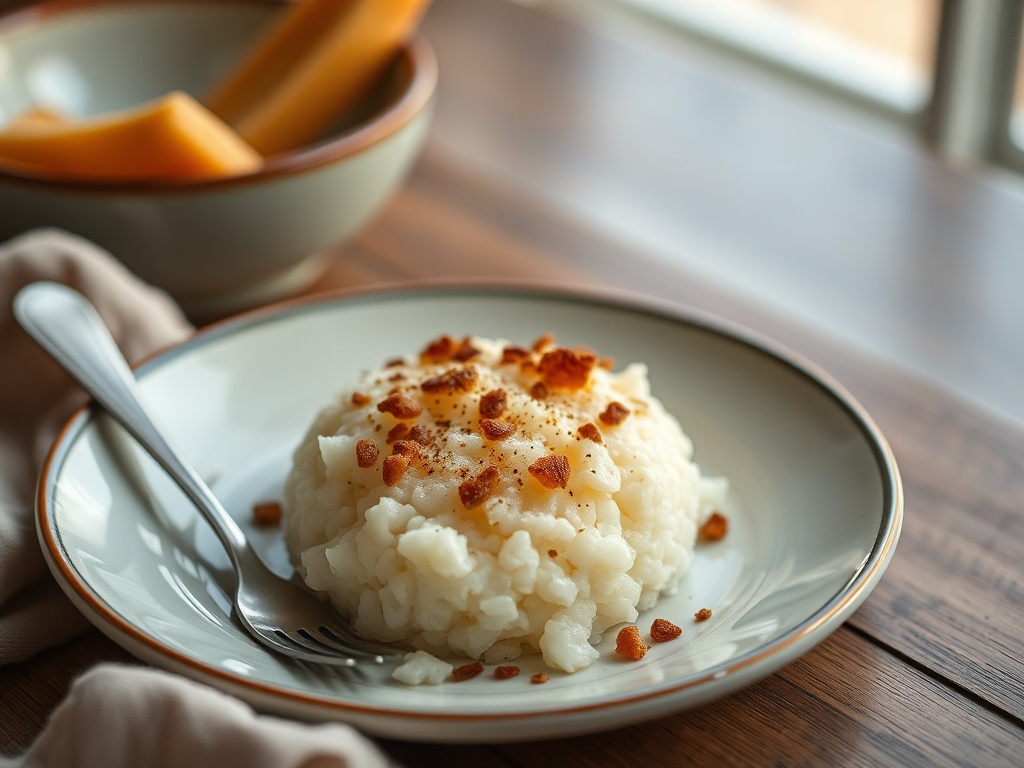
- Serve: Ladle the warm rice pudding into individual bowls. Dust with a little extra ground cinnamon if desired, and add any preferred toppings such as fresh berries, toasted nuts, a dollop of whipped cream, a drizzle of maple syrup, or plump raisins. Enjoy warm, at room temperature, or chilled.
Cooking Tips and Variations
Achieving the perfect old-fashioned rice pudding is all about patience and understanding the ingredients. The “low and slow” cooking method is paramount; rushing the process by using higher heat will inevitably lead to scorched milk and unevenly cooked rice. Invest in a good quality, heavy-bottomed saucepan, as this is your best defense against burning. Frequent stirring, especially as the pudding thickens, is non-negotiable. Don’t be afraid to taste as you go; adjust the sugar to your preference. Remember that the pudding will thicken considerably as it cools, so don’t overcook it to a very stiff consistency while it’s still hot.
For those looking to explore beyond the classic, the world of rice pudding offers endless possibilities. For a tropical twist, stir in a handful of shredded coconut and a splash of coconut milk along with the whole milk, then top with fresh mango. If you’re a chocolate lover, melt in a few ounces of your favorite dark chocolate or stir in a couple of tablespoons of cocoa powder during the last 10 minutes of cooking. Spices like cardamom, a pinch of nutmeg, or even a star anise pod (removed before serving) can add an exotic warmth. Citrus zest, particularly lemon or orange, brightens the flavor profile beautifully. For an adult-friendly version, a generous splash of rum, brandy, or bourbon added at the very end, just after removing from heat, provides a sophisticated depth. And if you’re looking for a firmer, more custard-like pudding, consider a baked rice pudding variation, often made with more eggs and cooked in a water bath in the oven, yielding a delightfully different texture.
Storage and Reheating
Old-fashioned rice pudding stores wonderfully, making it an excellent make-ahead dessert or breakfast option. Once the pudding has cooled completely, transfer it to an airtight container. It can be stored in the refrigerator for up to 3-4 days. Over time, the pudding will continue to thicken, and the rice will absorb more of the liquid, resulting in a denser consistency.
When it comes to reheating, you have a few options depending on your preference. For a warm, creamy texture, the best method is to reheat it gently on the stovetop. Transfer the desired portion to a saucepan and add a splash of milk (about 1-2 tablespoons per serving) to loosen it up. Heat over low heat, stirring constantly, until it reaches your desired temperature and consistency. Be careful not to overheat, as this can cause it to become too thick or even scorch. You can also reheat individual portions in the microwave. Place a serving in a microwave-safe bowl, add a splash of milk, and heat in 30-second intervals, stirring after each, until warmed through. Again, stir well to ensure even heating and to re-emulsify the pudding. If you prefer your rice pudding cold, simply enjoy it straight from the refrigerator – it’s equally delicious chilled!
Frequently Asked Questions
Why is my rice pudding still hard after cooking?
If your rice pudding is still hard, it’s usually because it hasn’t cooked long enough or the heat was too high, causing the milk to evaporate before the rice had a chance to fully soften. Ensure you’re cooking on the lowest possible heat for the recommended time, and stir frequently to promote even cooking and starch release. Using a heavy-bottomed pan also helps prevent scorching, allowing for a longer, gentler simmer.
Can I use brown rice for rice pudding?
While you technically can use brown rice, it will result in a significantly different texture and require a much longer cooking time, often twice as long, and more liquid. Brown rice has a tougher outer bran layer that prevents it from breaking down and releasing starch in the same way short-grain white rice does. This means it won’t achieve the same creamy, cohesive consistency of traditional old-fashioned rice pudding, and the result will be chewier and less smooth.
My rice pudding is too thick/thin. How can I fix it?
If your rice pudding is too thick after cooling, simply stir in a splash of milk (whole milk or cream works best) until it reaches your desired consistency. Add it gradually, a tablespoon at a time, to avoid making it too thin. If your rice pudding is too thin, it likely hasn’t cooked long enough. Return it to very low heat and continue to simmer, stirring frequently, until it thickens to your liking. Remember it will thicken considerably as it cools, so don’t aim for a super thick consistency while it’s still hot.