Introduction
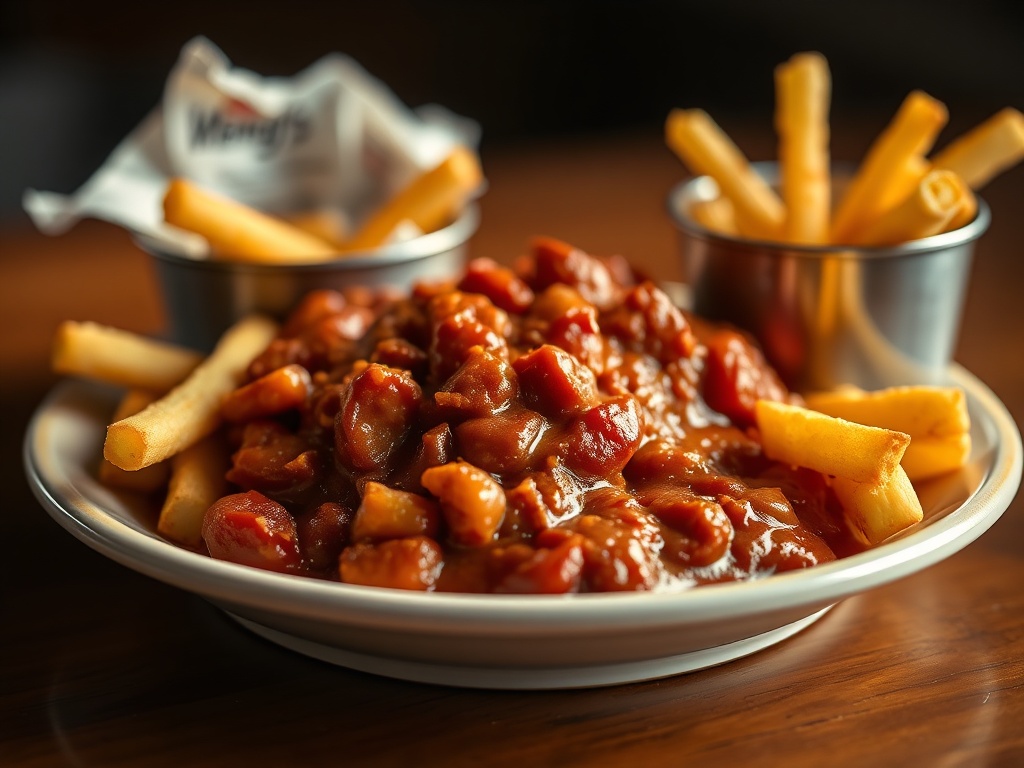
There are some fast-food items that transcend their humble origins to become true culinary icons, and Wendy’s Chili undoubtedly sits high on that list. More than just a side dish, this hearty, savory creation has garnered a loyal following for its distinct flavor, rich texture, and comforting warmth. It’s the kind of dish that evokes a sense of nostalgia, a go-to comfort food that many of us have enjoyed on countless occasions, whether it’s a chilly evening or a quick lunch break. But what makes Wendy’s Chili so uniquely beloved? It’s a masterful blend of finely crumbled beef, tender beans, and a deeply spiced tomato base that manages to be both complex and familiar at the same time.
For years, the secret to Wendy’s Chili has been a topic of fascination among food enthusiasts. The rumor, widely believed and even confirmed by some, is that Wendy’s uses their never-frozen, leftover hamburger patties as the foundation for their chili. This ingenious approach not only minimizes waste but also imparts a unique, pre-cooked, finely crumbled beef texture and a rich, beefy flavor that’s hard to replicate with just fresh ground beef. Combined with a signature blend of spices—where cumin and chili powder reign supreme—and a long, slow simmer, this chili develops an unparalleled depth of flavor and a thick, spoon-coating consistency that sets it apart from all other fast-food chilis.
This recipe is dedicated to unraveling that delicious mystery and empowering you to recreate the magic of Wendy’s Chili right in your own kitchen. We’ve meticulously studied the flavor profile, texture, and cooking process to bring you a copycat recipe that is so authentic, you might just wonder if you accidentally drove through the drive-thru. Get ready to dive into a bowl of pure comfort, packed with all the hearty goodness and distinctive taste that makes Wendy’s Chili an enduring classic. Prepare to impress your family and friends with a homemade version that rivals, and perhaps even surpasses, the original.
Nutritional Information
Per serving (approximate values):
- Calories: 380
- Protein: 30g
- Carbohydrates: 35g
- Fat: 15g
- Fiber: 10g
- Sodium: 850mg
Ingredients
- 2 tablespoons olive oil
- 2 pounds lean ground beef (80/20 or 85/15 recommended, or substitute with pre-cooked, crumbled hamburger patties for authenticity)
- 1 large yellow onion, finely diced
- 3 cloves garlic, minced
- 2 (14.5-ounce) cans diced tomatoes, undrained
- 1 (15-ounce) can tomato sauce
- 1 (6-ounce) can tomato paste
- 1 (15-ounce) can kidney beans, rinsed and drained
- 1 (15-ounce) can pinto beans, rinsed and drained
- 2 cups beef broth (low sodium recommended)
- 3 tablespoons chili powder
- 2 tablespoons ground cumin
- 1 teaspoon dried oregano
- 1 teaspoon smoked paprika
- 1/2 teaspoon cayenne pepper (adjust to desired heat)
- 1 teaspoon salt (or to taste)
- 1/2 teaspoon black pepper (or to taste)
- 1 tablespoon Worcestershire sauce
- 1 teaspoon granulated sugar (balances acidity)
- Optional: 1/4 cup strong brewed coffee or 1 teaspoon unsweetened cocoa powder (for depth of flavor)
Instructions
- Heat the olive oil in a large Dutch oven or heavy-bottomed pot over medium-high heat. Add the ground beef and cook, breaking it up into very fine crumbles with a wooden spoon or spatula. Continue cooking until the beef is thoroughly browned and no pink remains. This fine crumble is crucial for replicating Wendy’s texture.
- Once the beef is browned, drain off any excess fat from the pot. If using pre-cooked hamburger patties, crumble them finely and add them to the pot, skipping the initial browning step with oil.
- Add the finely diced yellow onion to the pot with the beef. Sauté for 5-7 minutes, stirring occasionally, until the onion softens and becomes translucent.
- Stir in the minced garlic and tomato paste. Cook for another 1-2 minutes, stirring constantly, to toast the tomato paste and release its flavor.
- Add the chili powder, ground cumin, dried oregano, smoked paprika, cayenne pepper, salt, and black pepper to the pot. Stir well and cook for 1 minute, allowing the spices to toast and become fragrant. This step enhances their flavor significantly.
- Pour in the diced tomatoes (undrained), tomato sauce, rinsed and drained kidney beans, rinsed and drained pinto beans, and beef broth. Stir everything together until well combined.
- Add the Worcestershire sauce and granulated sugar. If using, stir in the strong brewed coffee or unsweetened cocoa powder now.
- Bring the chili to a gentle boil, then reduce the heat to low. Cover the pot and let the chili simmer for at least 2 to 3 hours, stirring occasionally to prevent sticking and ensure even cooking. The longer it simmers, the more the flavors will meld and deepen, and the chili will thicken to the desired consistency.
- After simmering, taste the chili and adjust the seasonings as needed. You may want to add more salt, pepper, chili powder, or a touch more sugar to balance the flavors to your preference.
- Serve hot with your favorite toppings.
Cooking Tips and Variations
To truly nail that authentic Wendy’s Chili flavor and texture, the devil is in the details, especially when it comes to the beef. If you’re using raw ground beef, the key is to brown it thoroughly and, most importantly, crumble it exceptionally finely. Think small pebbles, not large chunks. This mimics the consistency of the beef in Wendy’s original, which is said to come from pre-cooked, finely ground hamburger patties. For the ultimate authenticity, consider browning your ground beef in patty form first, then crumbling it into the chili. This extra step helps simulate the texture and flavor profile of the original’s alleged “leftover burger” base. Always remember to drain off any excess fat after browning to prevent a greasy chili.
The simmer time is perhaps the most non-negotiable aspect of this recipe. While it might be tempting to rush it, a long, slow simmer for at least 2 to 3 hours is absolutely crucial. This extended cooking period allows all the different flavors from the spices, tomatoes, and beef to meld together, creating a rich, complex, and harmonious taste profile that simply can’t be achieved with a shorter cook time. Furthermore, the slow simmer helps the chili thicken naturally, developing that signature hearty, spoon-coating consistency. Don’t be afraid to let it go longer; chili almost always tastes better the next day after the flavors have had even more time to develop.
When it comes to spices, don’t be shy, but do taste and adjust. Cumin and chili powder are the stars, providing the earthy, savory foundation of Wendy’s Chili, so ensure you’re using fresh, good-quality spices. A pro-tip is to briefly toast the dry spices with the aromatics (onion and garlic) before adding any liquids. This quick toasting step awakens their essential oils and significantly enhances their flavor, making them more vibrant and aromatic in the final dish. Additionally, balancing acidity and sweetness is vital. Tomatoes can be quite acidic, and a pinch of sugar or even a finely grated carrot can help round out the flavors without making the chili overtly sweet. For an even deeper, more complex flavor, a small splash of strong brewed coffee or a tiny bit of unsweetened cocoa powder can work wonders, adding a subtle richness that mirrors the depth found in the original.
If you find your chili is too thick after simmering, simply add a bit more beef broth until it reaches your desired consistency. Conversely, if it’s too thin, remove the lid and continue to simmer uncovered for a while longer, allowing some of the liquid to evaporate. This recipe is also quite versatile for dietary adaptations. For a vegetarian or vegan version, substitute the ground beef with plant-based crumbles and use vegetable broth. Ensure that your Worcestershire sauce is vegan-friendly (many contain anchovies) or use a suitable alternative. For those following a gluten-free diet, double-check that your beef broth and Worcestershire sauce are certified gluten-free, as these can sometimes contain hidden gluten.
Storage and Reheating
One of the many wonderful things about chili is that it often tastes even better the next day, after the flavors have had more time to meld and deepen. To store leftover Wendy’s Chili, allow it to cool completely to room temperature first. Then, transfer it to an airtight container. It will keep beautifully in the refrigerator for 3 to 4 days. For longer storage, chili freezes exceptionally well. Portion the cooled chili into freezer-safe containers or heavy-duty freezer bags, leaving a little headspace if using containers to allow for expansion. It can be frozen for up to 3 months without significant loss of quality or flavor. Thaw frozen chili overnight in the refrigerator before reheating.
When it’s time to reheat your chili, there are a few effective methods. The easiest way is on the stovetop: transfer the chili to a pot or saucepan over medium-low heat. Stir occasionally, adding a splash of beef broth or water if it seems too thick, until it’s heated through and simmering gently. This usually takes about 10-15 minutes, depending on the quantity. Alternatively, you can reheat individual portions in the microwave. Place the chili in a microwave-safe bowl, cover it loosely, and heat on high for 2-3 minutes, stirring halfway through, until thoroughly hot. Be careful not to overheat, as this can cause the beans to become mushy. Always ensure the chili reaches an internal temperature of 165°F (74°C) for food safety.
Frequently Asked Questions
What makes Wendy’s Chili so unique compared to other fast-food chilis?
Wendy’s Chili stands out primarily due to two key factors: the alleged use of finely crumbled, pre-cooked hamburger patties from their never-frozen beef, which imparts a distinct texture and beefy flavor, and its balanced, deeply savory spice blend featuring prominent cumin and chili powder without the inclusion of bell peppers, common in many other chilis. The long simmer time also contributes to its rich, melded flavors.
Can I make this chili in a slow cooker?
Yes, this recipe adapts very well to a slow cooker! After browning the beef and sautéing the aromatics and spices on the stovetop as instructed, transfer everything to your slow cooker. Add all remaining ingredients, stir well, and cook on low for 6-8 hours or on high for 3-4 hours. The slow cooker method is excellent for developing deep flavors with minimal effort.
What are the best toppings to serve with Wendy’s Chili?
For an authentic Wendy’s experience, classic toppings include shredded cheddar cheese, finely diced raw onion, and a dollop of sour cream. Oyster crackers are also a quintessential accompaniment. Beyond that, feel free to get creative with jalapeños (fresh or pickled), fresh cilantro, a dash of hot sauce, or even a side of warm cornbread or tortilla chips.
Why does the recipe call for sugar? Does Wendy’s Chili taste sweet?
The small amount of sugar in the recipe is not intended to make the chili taste sweet. Instead, it serves a crucial role in balancing the acidity from the large quantity of tomatoes. Tomatoes can be quite tart, and a touch of sugar helps to round out the flavors, creating a more harmonious and less sharp taste profile, much like the original Wendy’s Chili.